OVERVIEW:
Happy new year! I ate and slept too much during the break. This time, I’ll interact with the Arduino through a computer application. I will also introduce an Arduino-like IDE - Processing. By the way, we have only two more episodes until the end of this series - this one and the next one. So, I’m thinking about finding a new series to work on, or I’m just spending more time on DIY Arduino and Robot. Currently, I’m working for the FRC team of my school and having many AP courses running. I’m also studying for the final exam of semester 1. That’s a lot of work, but I’ll try.
PARTS:
- 1 x Arduino UNO
- 1 x Breadboard
- 1 x 10-kilohm rotary potentiometer
- 6 x jumper wires
INTRODUCTION TO PROCESSING:
Processing IDE is an Arduino-like IDE. I think Processing is a combination of Java and Arduino. The IDE is 80% similar to the Arduino IDE, but it has a few more options. More importantly, Processing can compile and run a Java application on the computer.
You can download it here. After installing Processing, customize it as you want, then we can create communication between our computer to the Arduino by a Java program. To understand more about the Processing syntax, please take a look at its reference.
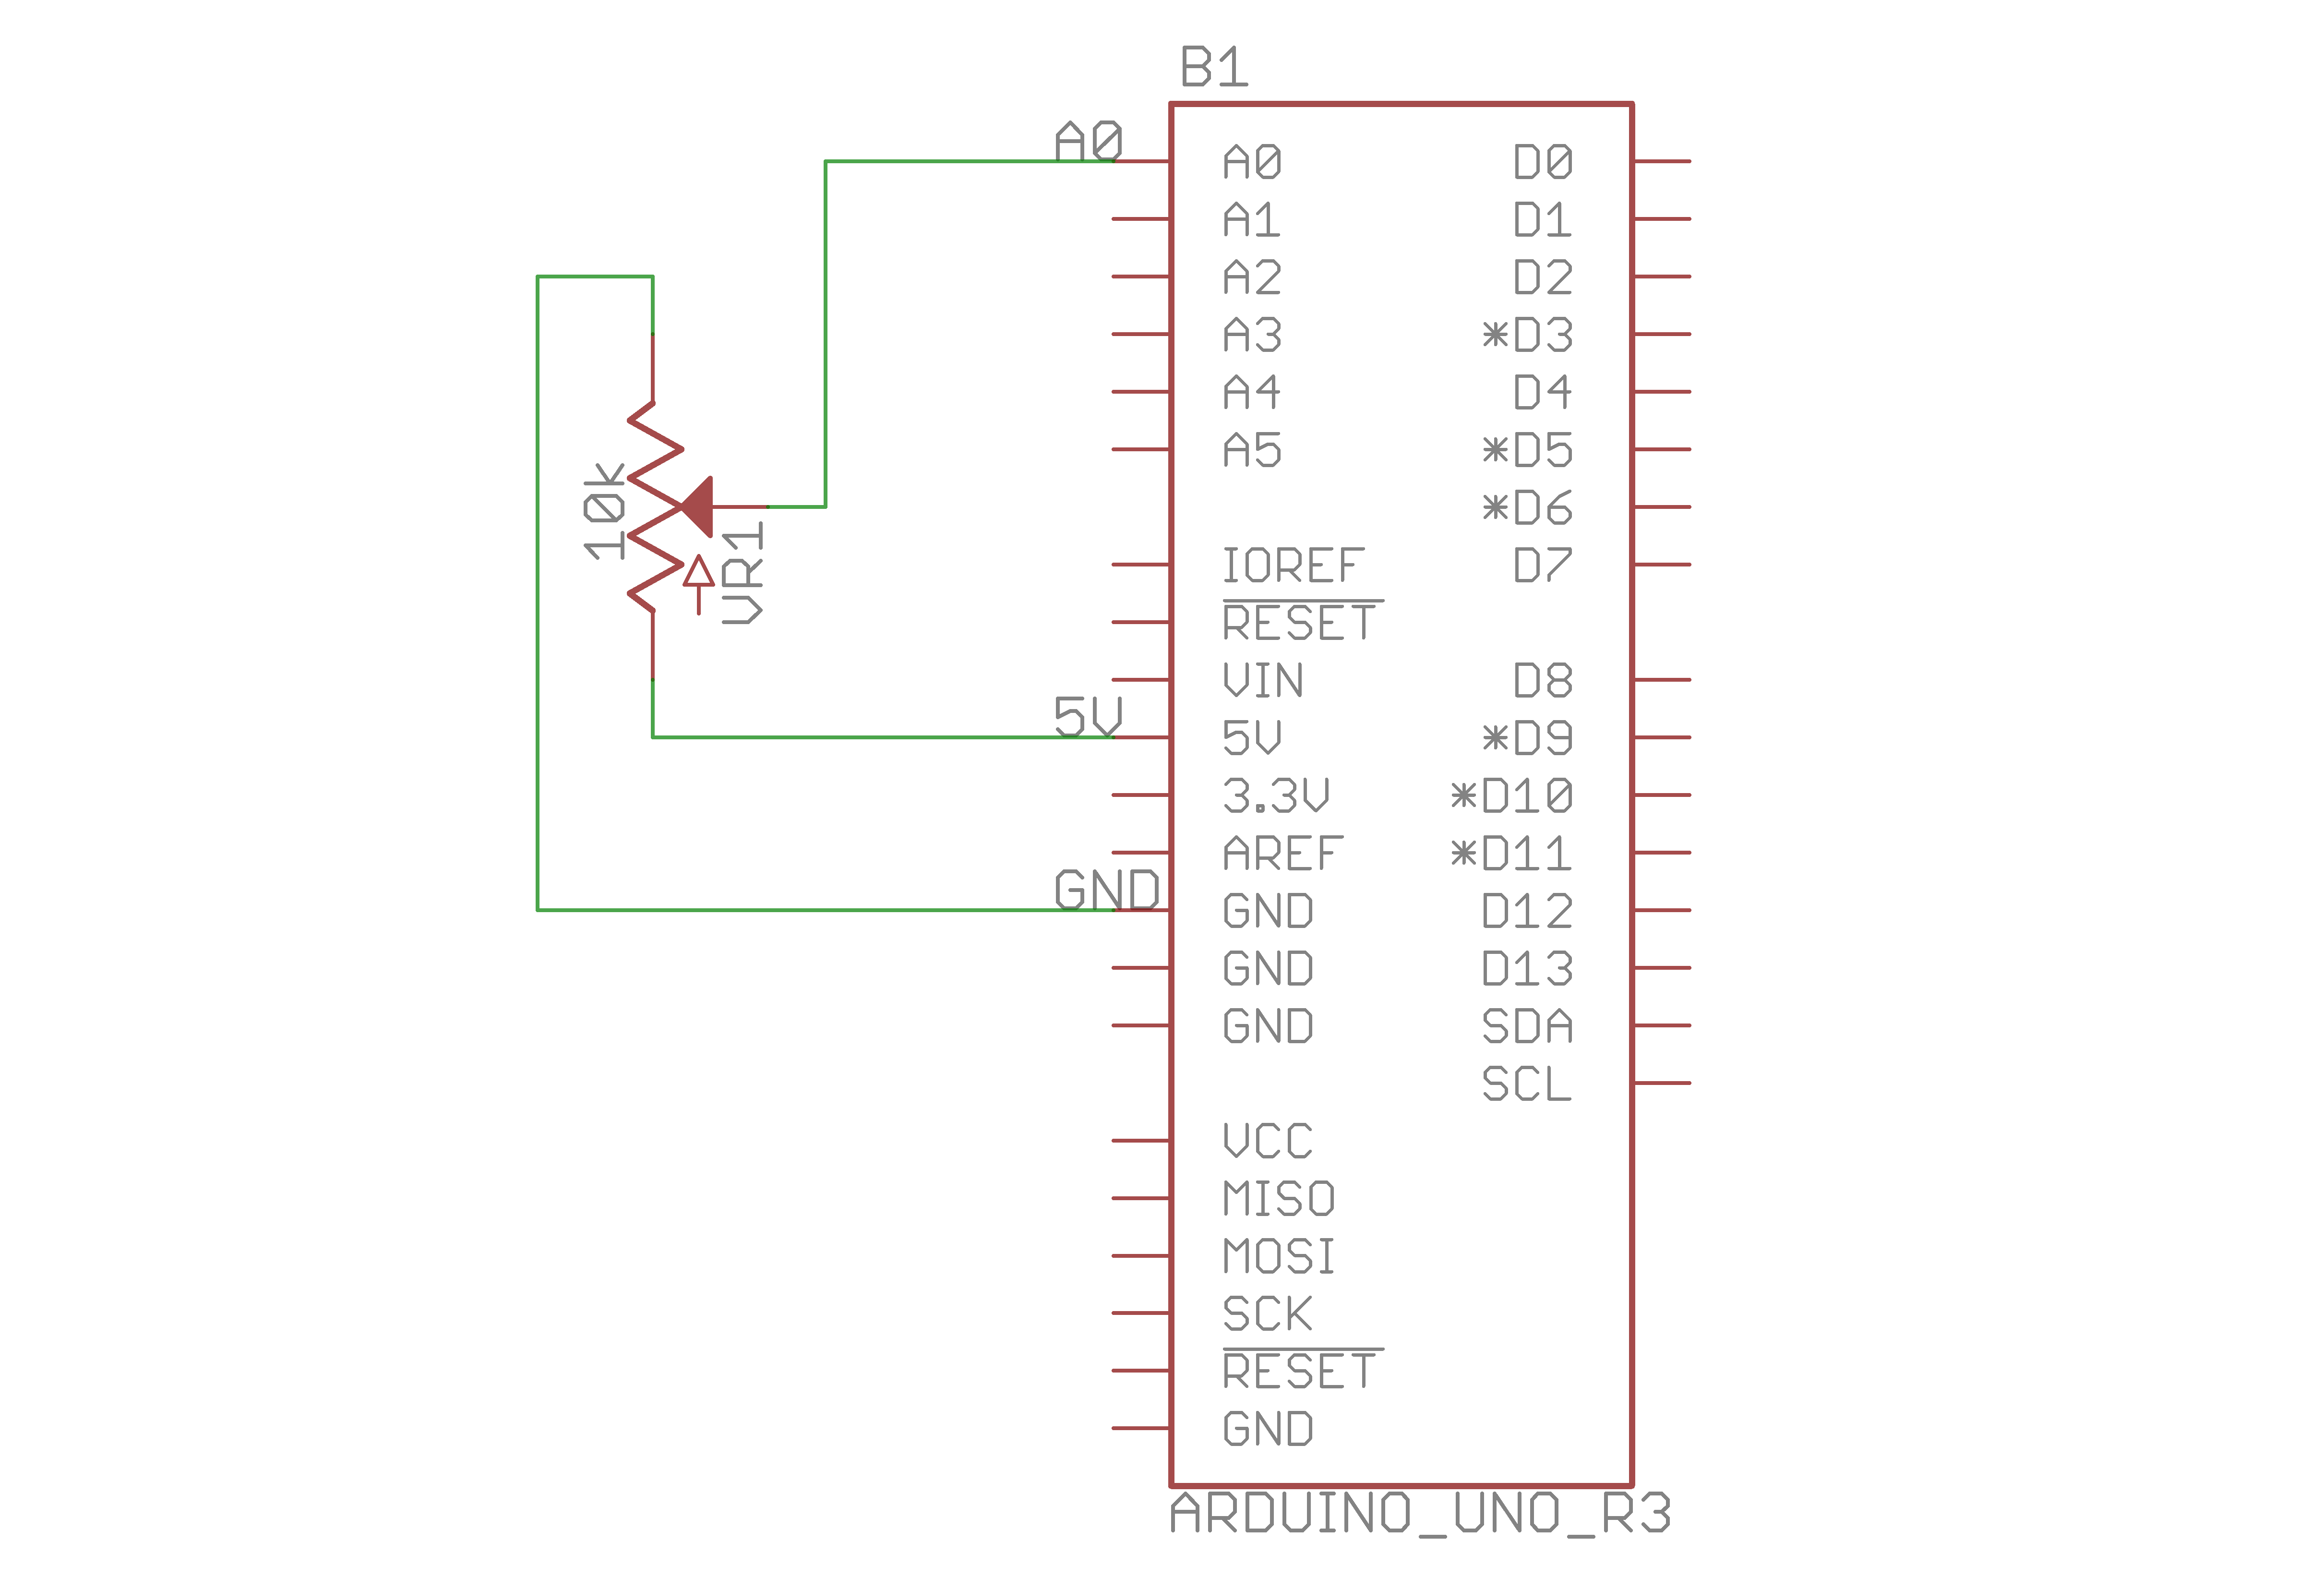
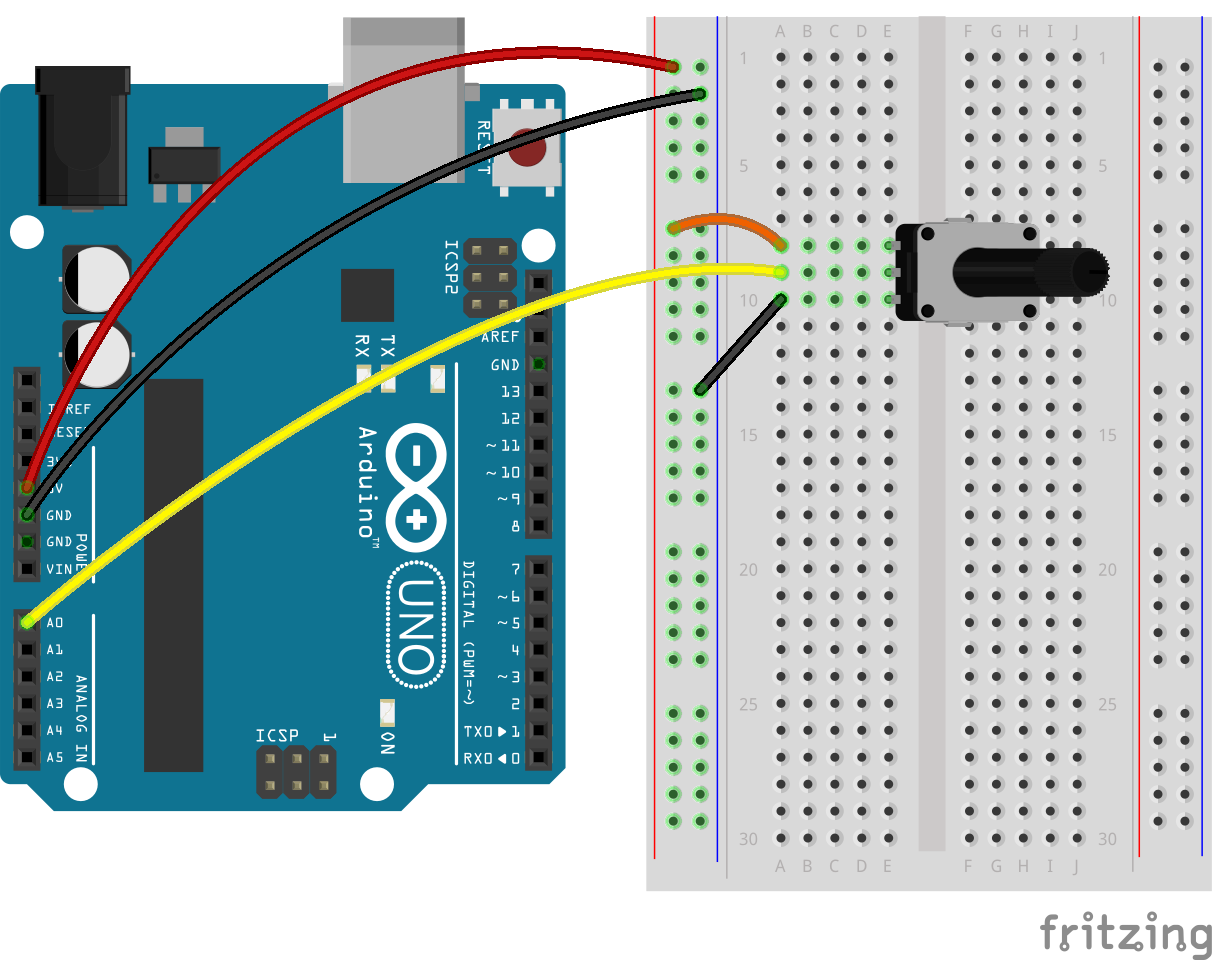
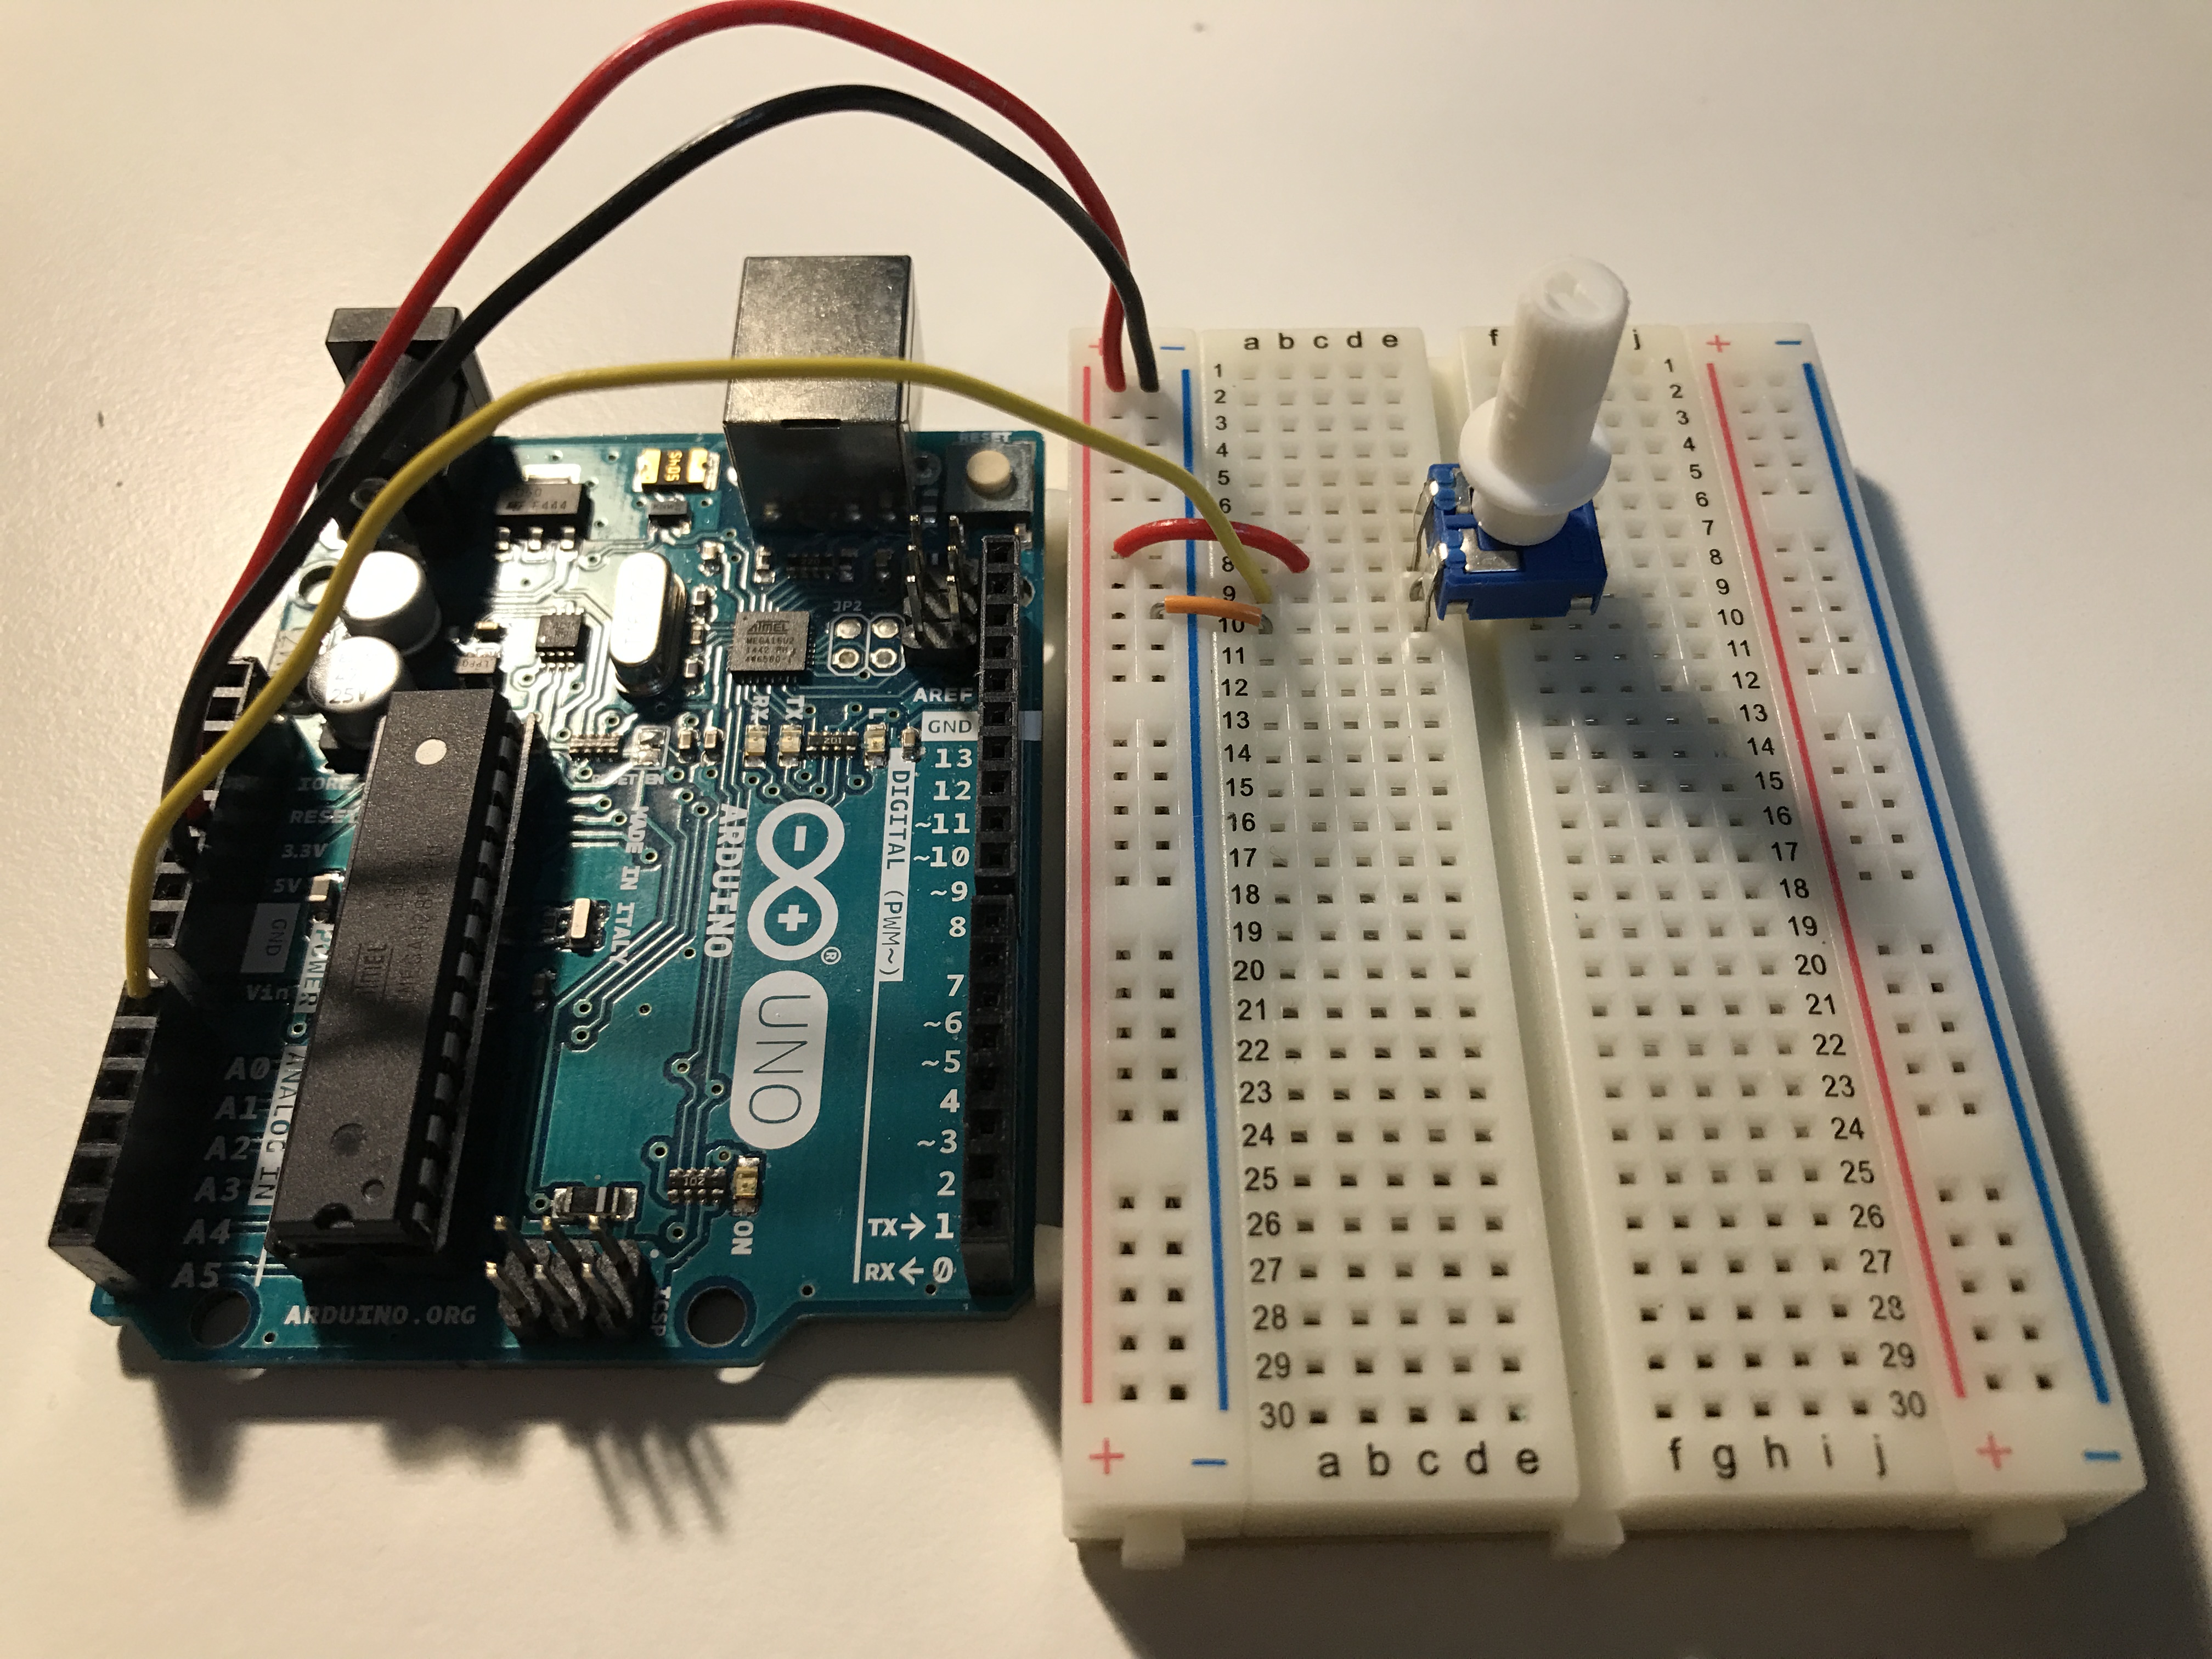
CIRCUIT LAYOUT:
We only need to know how to connect a potentiometer to an analog pin of the Arduino.
ARDUINO CODE:
Basically, we only need to write a program that read values from the potentiometer and then convert that value (which ranges from 0 to 1024) to right values for the Serial Monitor (0-255).
1
2
3
4
5
6
7
8
9
10
11
12
13
14
15
16
17
18
19
20
21
22
23
24
25
26
27
28
29
/**
 * Project Name: Arduino Projects Book - Project 14: Tweak the Arduino Logo
 *
 * File Name: tweak_the_arduino_logo.ino
 *
 * Description: Using serial communication, the Arduino can send and receive
 * information to the computer. Draws the Arduino logo on the computer screen
 * and adjust the background color by the potentiometer
 *
 * Author: Zhengqi Dong
 * Location:
 */

// Required hardware I/O connections
const byte POT_PIN = A0;     // potentiometer connected to A0

// Global constants
const int BAUD_RATE = 19200; // for serial monitor

void setup() {
    Serial.begin(BAUD_RATE);
}

void loop() {
    // potentiometer reads values from 0 to 1024
    // map it to 0-255 to speed up the communication
    Serial.write(analogRead(POT_PIN) / 4);
    delay(1); // stabilize the pot
}
This time, I used Serial.write(), not Serial.println(). Serial.println() is to write the value after being formatted by the Arduino. The Serial.write() function returns the raw value from what the Arduino actually reads. We will want it to be raw so that our code in Processing can “cook” it :)
PROCESSING CODE:
That’s what I uploaded to my Arduino. Next step is to write a program on the computer so that my Arduino can communicate with it.
1
2
3
4
5
6
7
8
9
10
11
12
13
14
15
16
17
18
19
20
21
22
23
24
25
26
27
28
29
30
31
32
33
34
35
36
37
38
39
40
41
42
43
44
45
46
47
48
49
50
51
52
53
54
55
56
57
58
/**
 * Project Name: Arduino Projects Book - Project 14: Tweak the Arduino Logo
 *
 * File Name: tweak_the_arduino_logo.pde
 *
 * Description: Using serial communication, the Arduino can send and receive
 * information to the computer. Draws the Arduino logo on the computer screen
 * and adjust the background color by the potentiometer
 *
 * Author: Zhengqi Dong
 * Location:
 */

import processing.serial.*;
Serial MyPort;
PImage logo;

// Global constants
final int BAUD_RATE       = 19200; // must be the same as the Arduino
final String LOGO_ADDRESS = "http://www.arduino.cc/arduino_logo.png";

// Global variables
int bgcolor = 0; // holds the background color

void setup() {
    size(1, 1);
    surface.setResizable(true);
    // set the color mode to Hue/Saturation/Brightness
    colorMode(HSB, 255);

    // load the Arduino logo into the PImage instance
    logo = loadImage(LOGO_ADDRESS);

    // make the window the same size as the image
    surface.setSize(logo.width, logo.height);

    // print a list of available serial ports to the
    // Processing staus window
    println("Available serial ports:");
    println(Serial.list());

    // Tell the serial object the information it needs to communicate
    MyPort = new Serial(this, Serial.list()[0], BAUD_RATE);
}

void draw() {
    if (MyPort.available() > 0) {
        // read and print for easy debugging
        bgcolor = MyPort.read();
        println(bgcolor);

        // draw the background by RGB color (each channel ranges 0-255)
        background(bgcolor, 255, 255);

        // draw the Arduino logo
        image(logo, 0, 0);
    }
}
Once the program runs, it may be reacting slowly to the changing of the potentiometer value. Be patient.
USING:
I struggled to get the background change its color. It reacted so slowly. Despite the fact that we can use the combination of Processing and Arduino to do other interesting stuff, I don’t think serial communication (UART) is the way to go since it only has a certain number of bits on the register to operate.
