OVERVIEW:
In this project, we will simulate how the crystal ball works. People say their wishes and shake the ball, then it will reveal the answer for the wish. Similarly, we will use the tilt switch as a crystal ball. However, we need one more thing to display the mysterious answer. Today, we will meet the liquid crystal display (LCD).
LCD:
The LCD can be used to display alphanumeric characters. My LCD has 16 columns and 2 rows, numbering from 0 to 15 and 0 to 1, respectively.
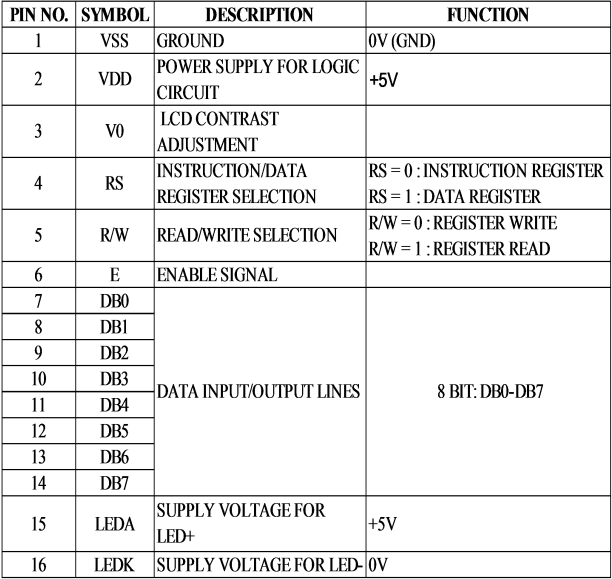
From the interface of these pins, we can clearly see that:
-
Pin NO.1 Vss is GND, and so it must be connected to GND.
-
Pin NO.2 Vcc (or Vdd) is the power supply. We should connect it to +5V of the Arduino.
-
Pin NO.3 V0 controls the LCD’s contrast. In this project, we will connect V0 to a rotary potentiometer.
-
Pin NO.4 RS, as the description says, is the register selection. If
RS = 0, the LCD will use instruction register . WhenRS = 1, the data register will be activated. Because RS only has two values0and1and we want to use both, we will connect it to a digital pin. -
Pin NO.5 R/W provides the selection between Read and Write. If
R/W = 0, the LCD will only write on the screen. WhenR/W = 1, the LCD will read from the screen. Because we only need to write on the screen, we will connect R/W straight to GND. -
Pin NO.6 E, aka Enable signal, and the 8-bit data I/O line, pin NO.7 D0 (or DB0) to pin NO.14 D7 (or DB7), will be discussed later in the CODE section.
-
Pin NO.15 LEDA (LED anode, or LED+) is the anode of the backlight system for the LCD and should be connected to +5V.
-
Pin NO.16 LEDK (LED cathode, or LED-) is the cathode of the backlight system for the LCD and should be connected to GND.
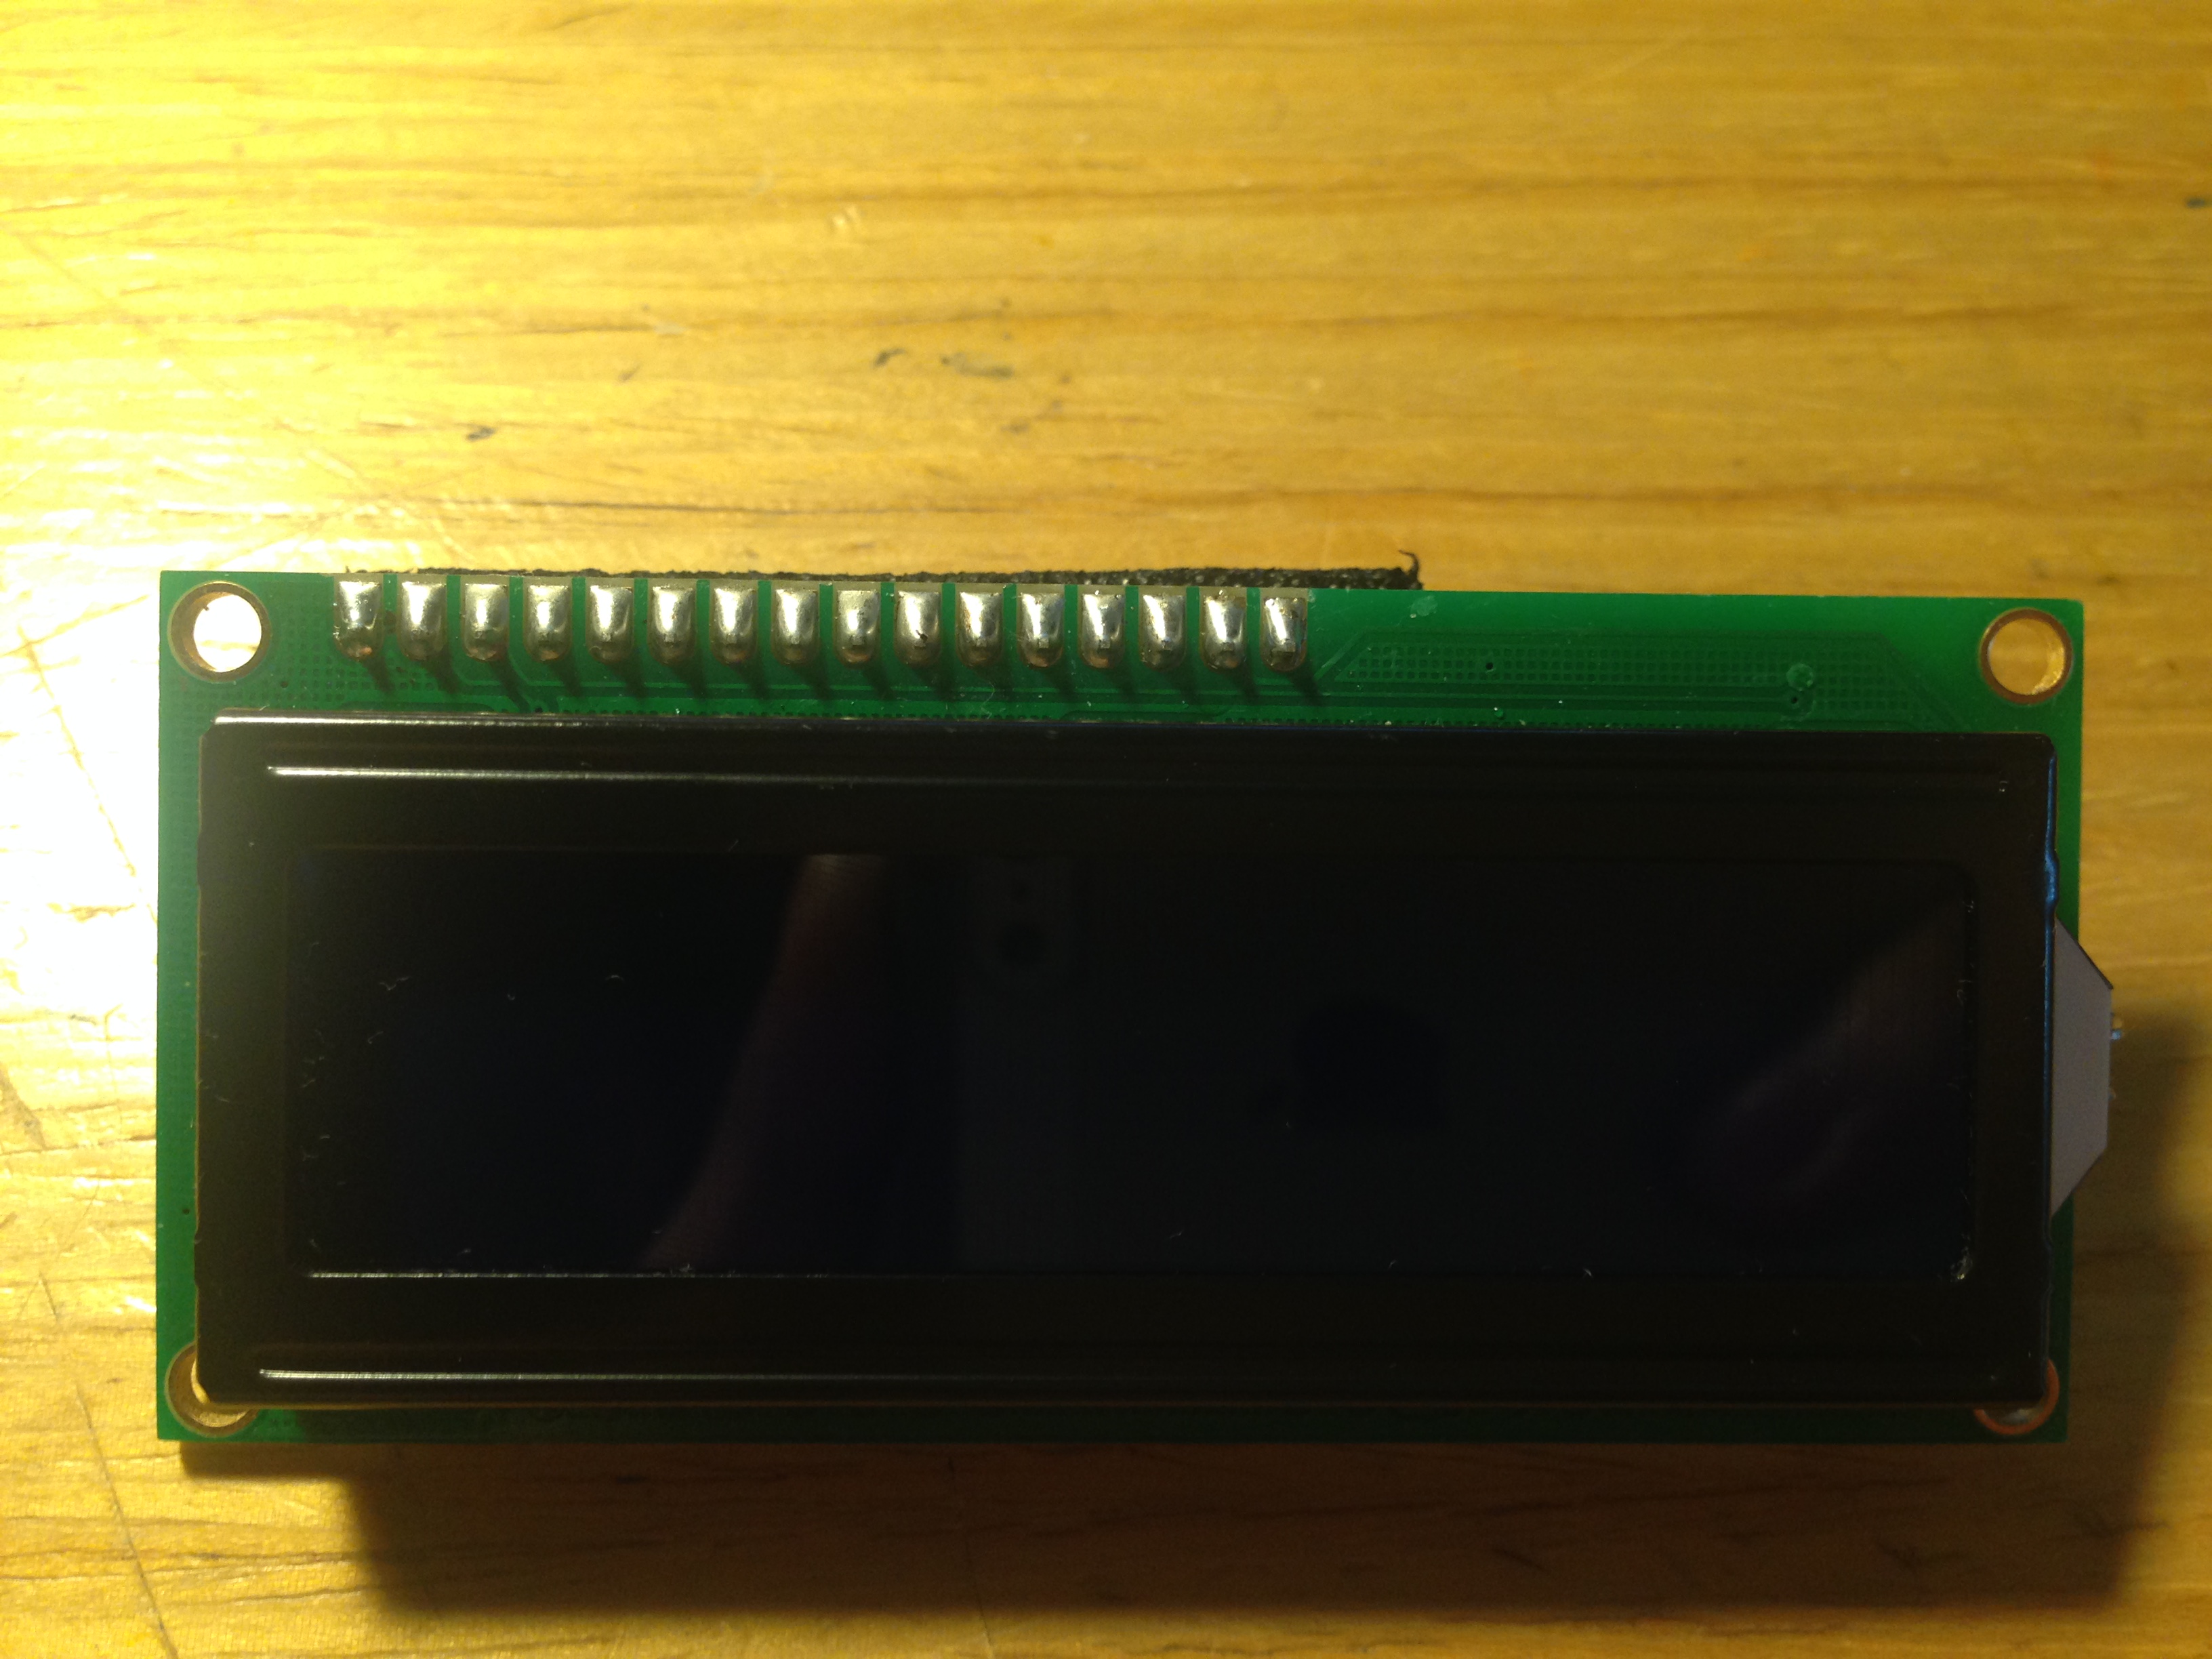
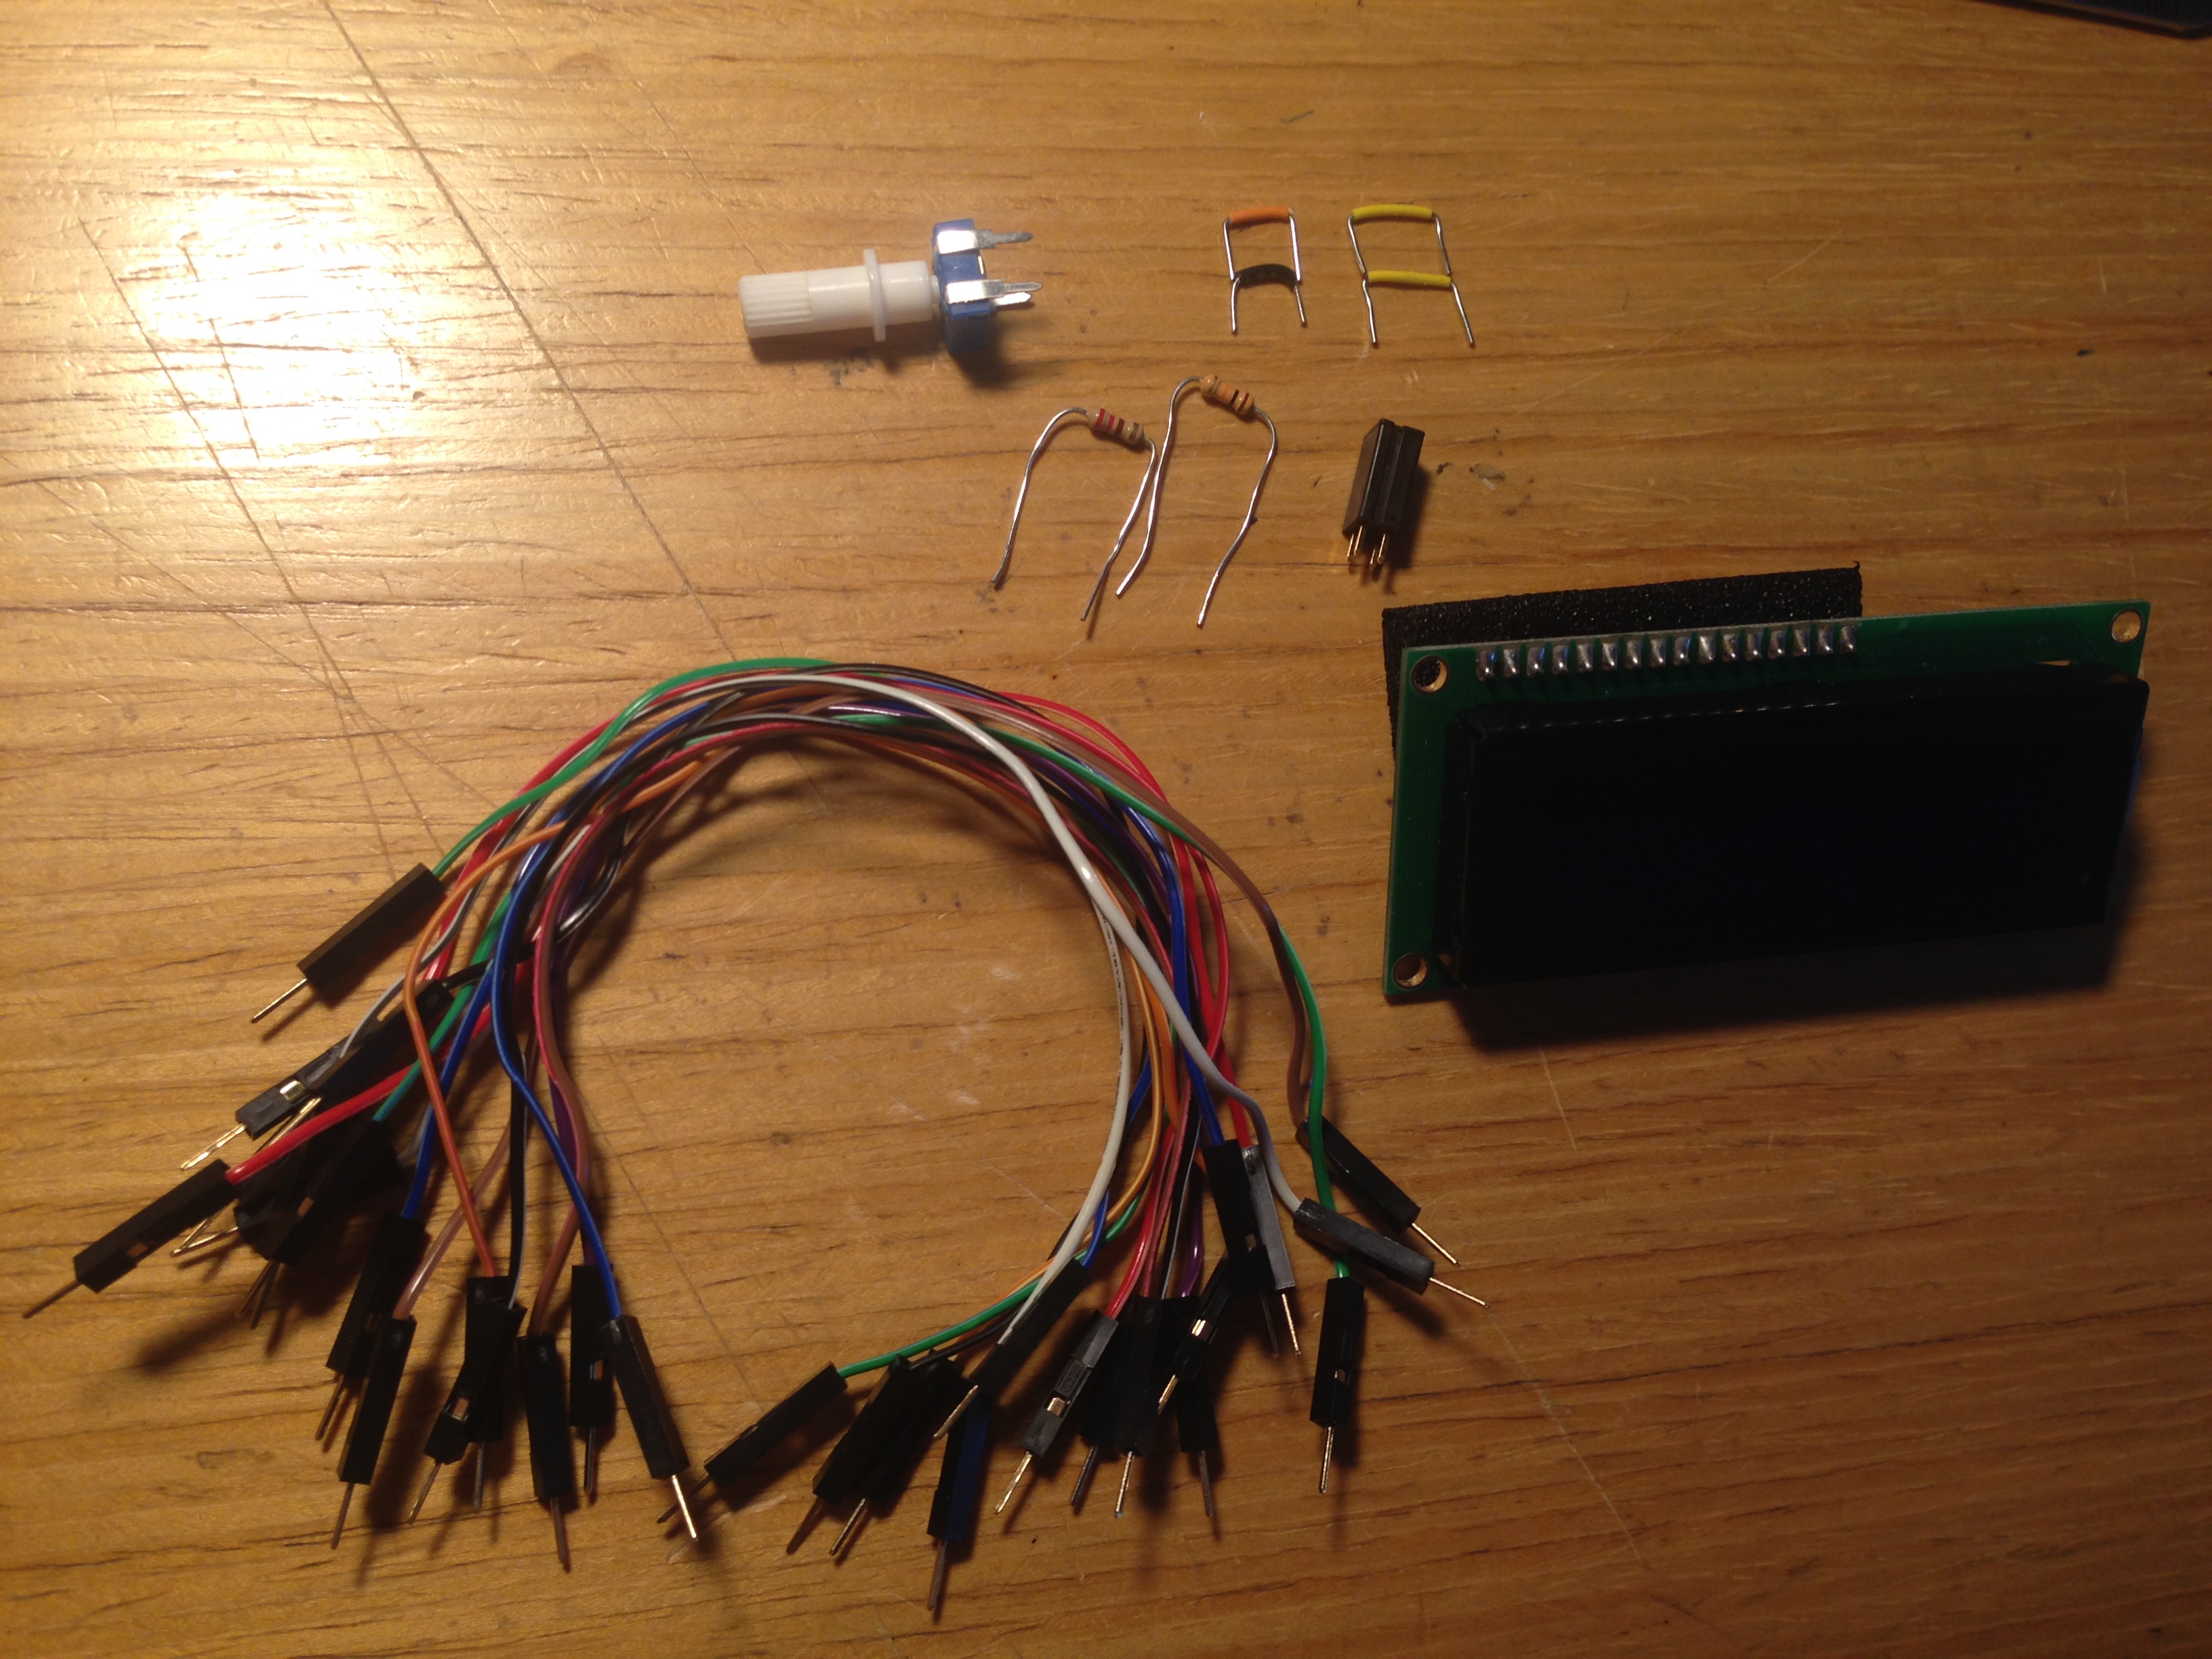
This is the LCD that I have in my kit:
PARTS:
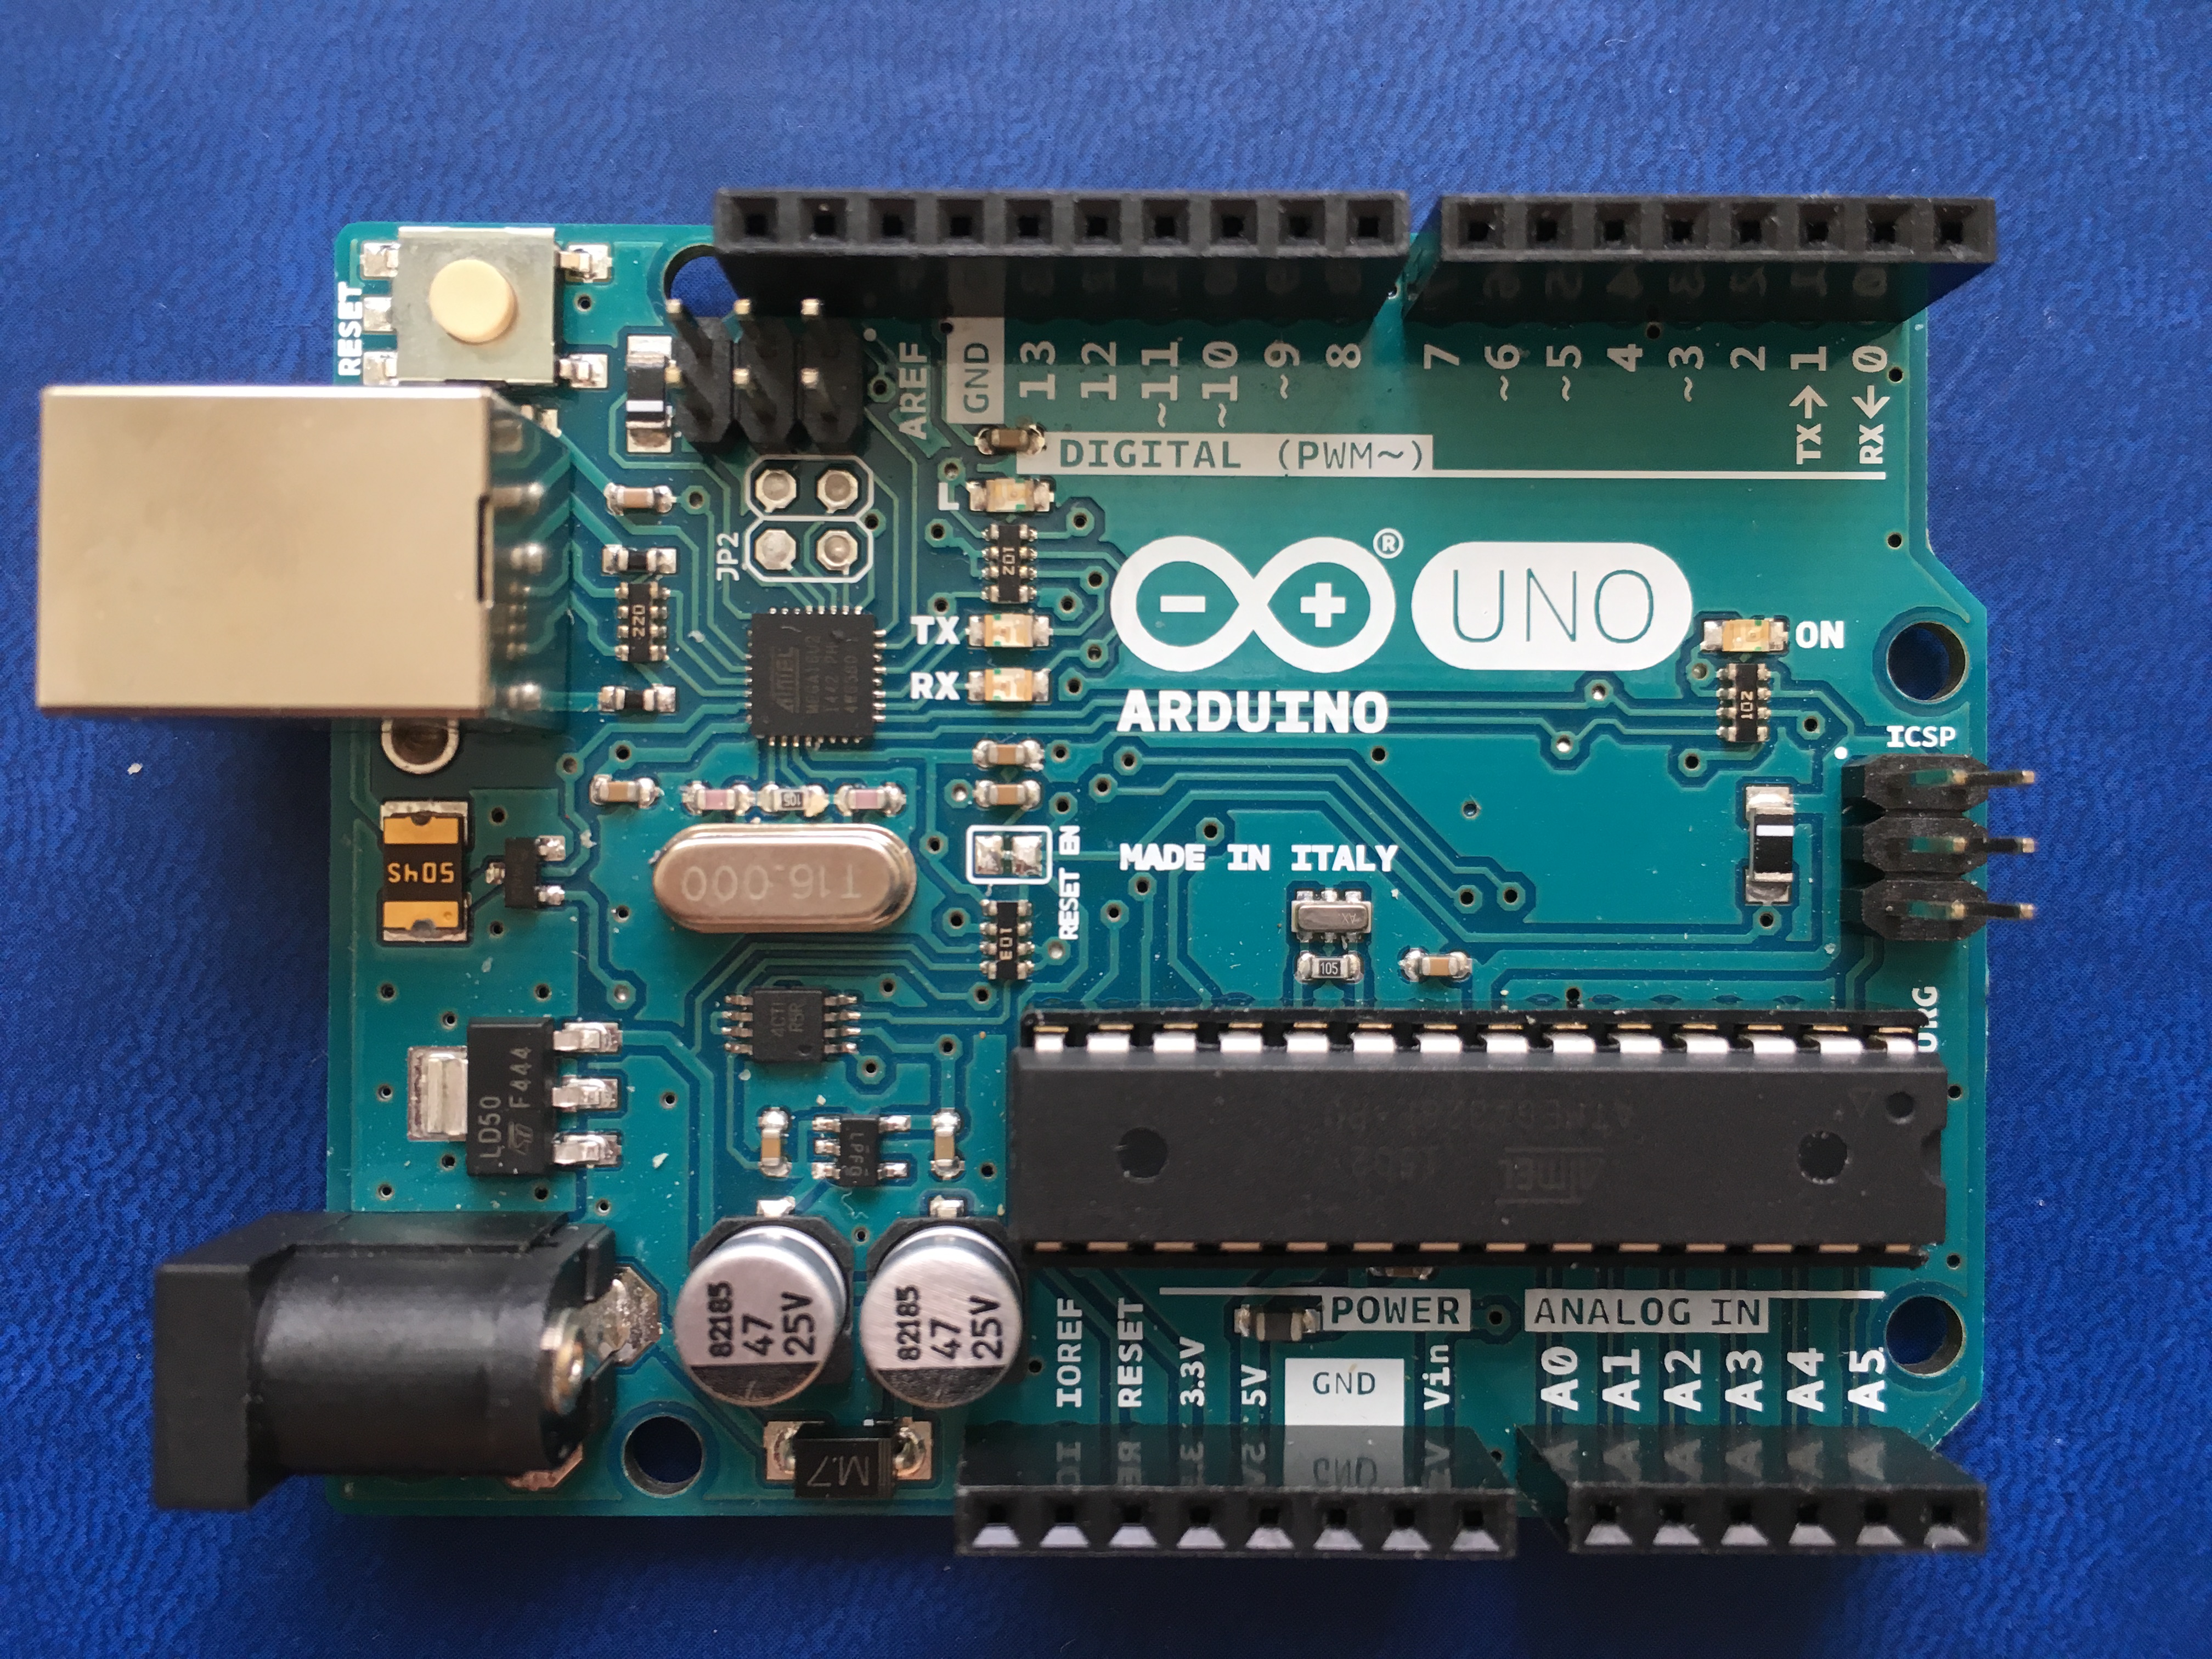
- 1 x Arduino UNO
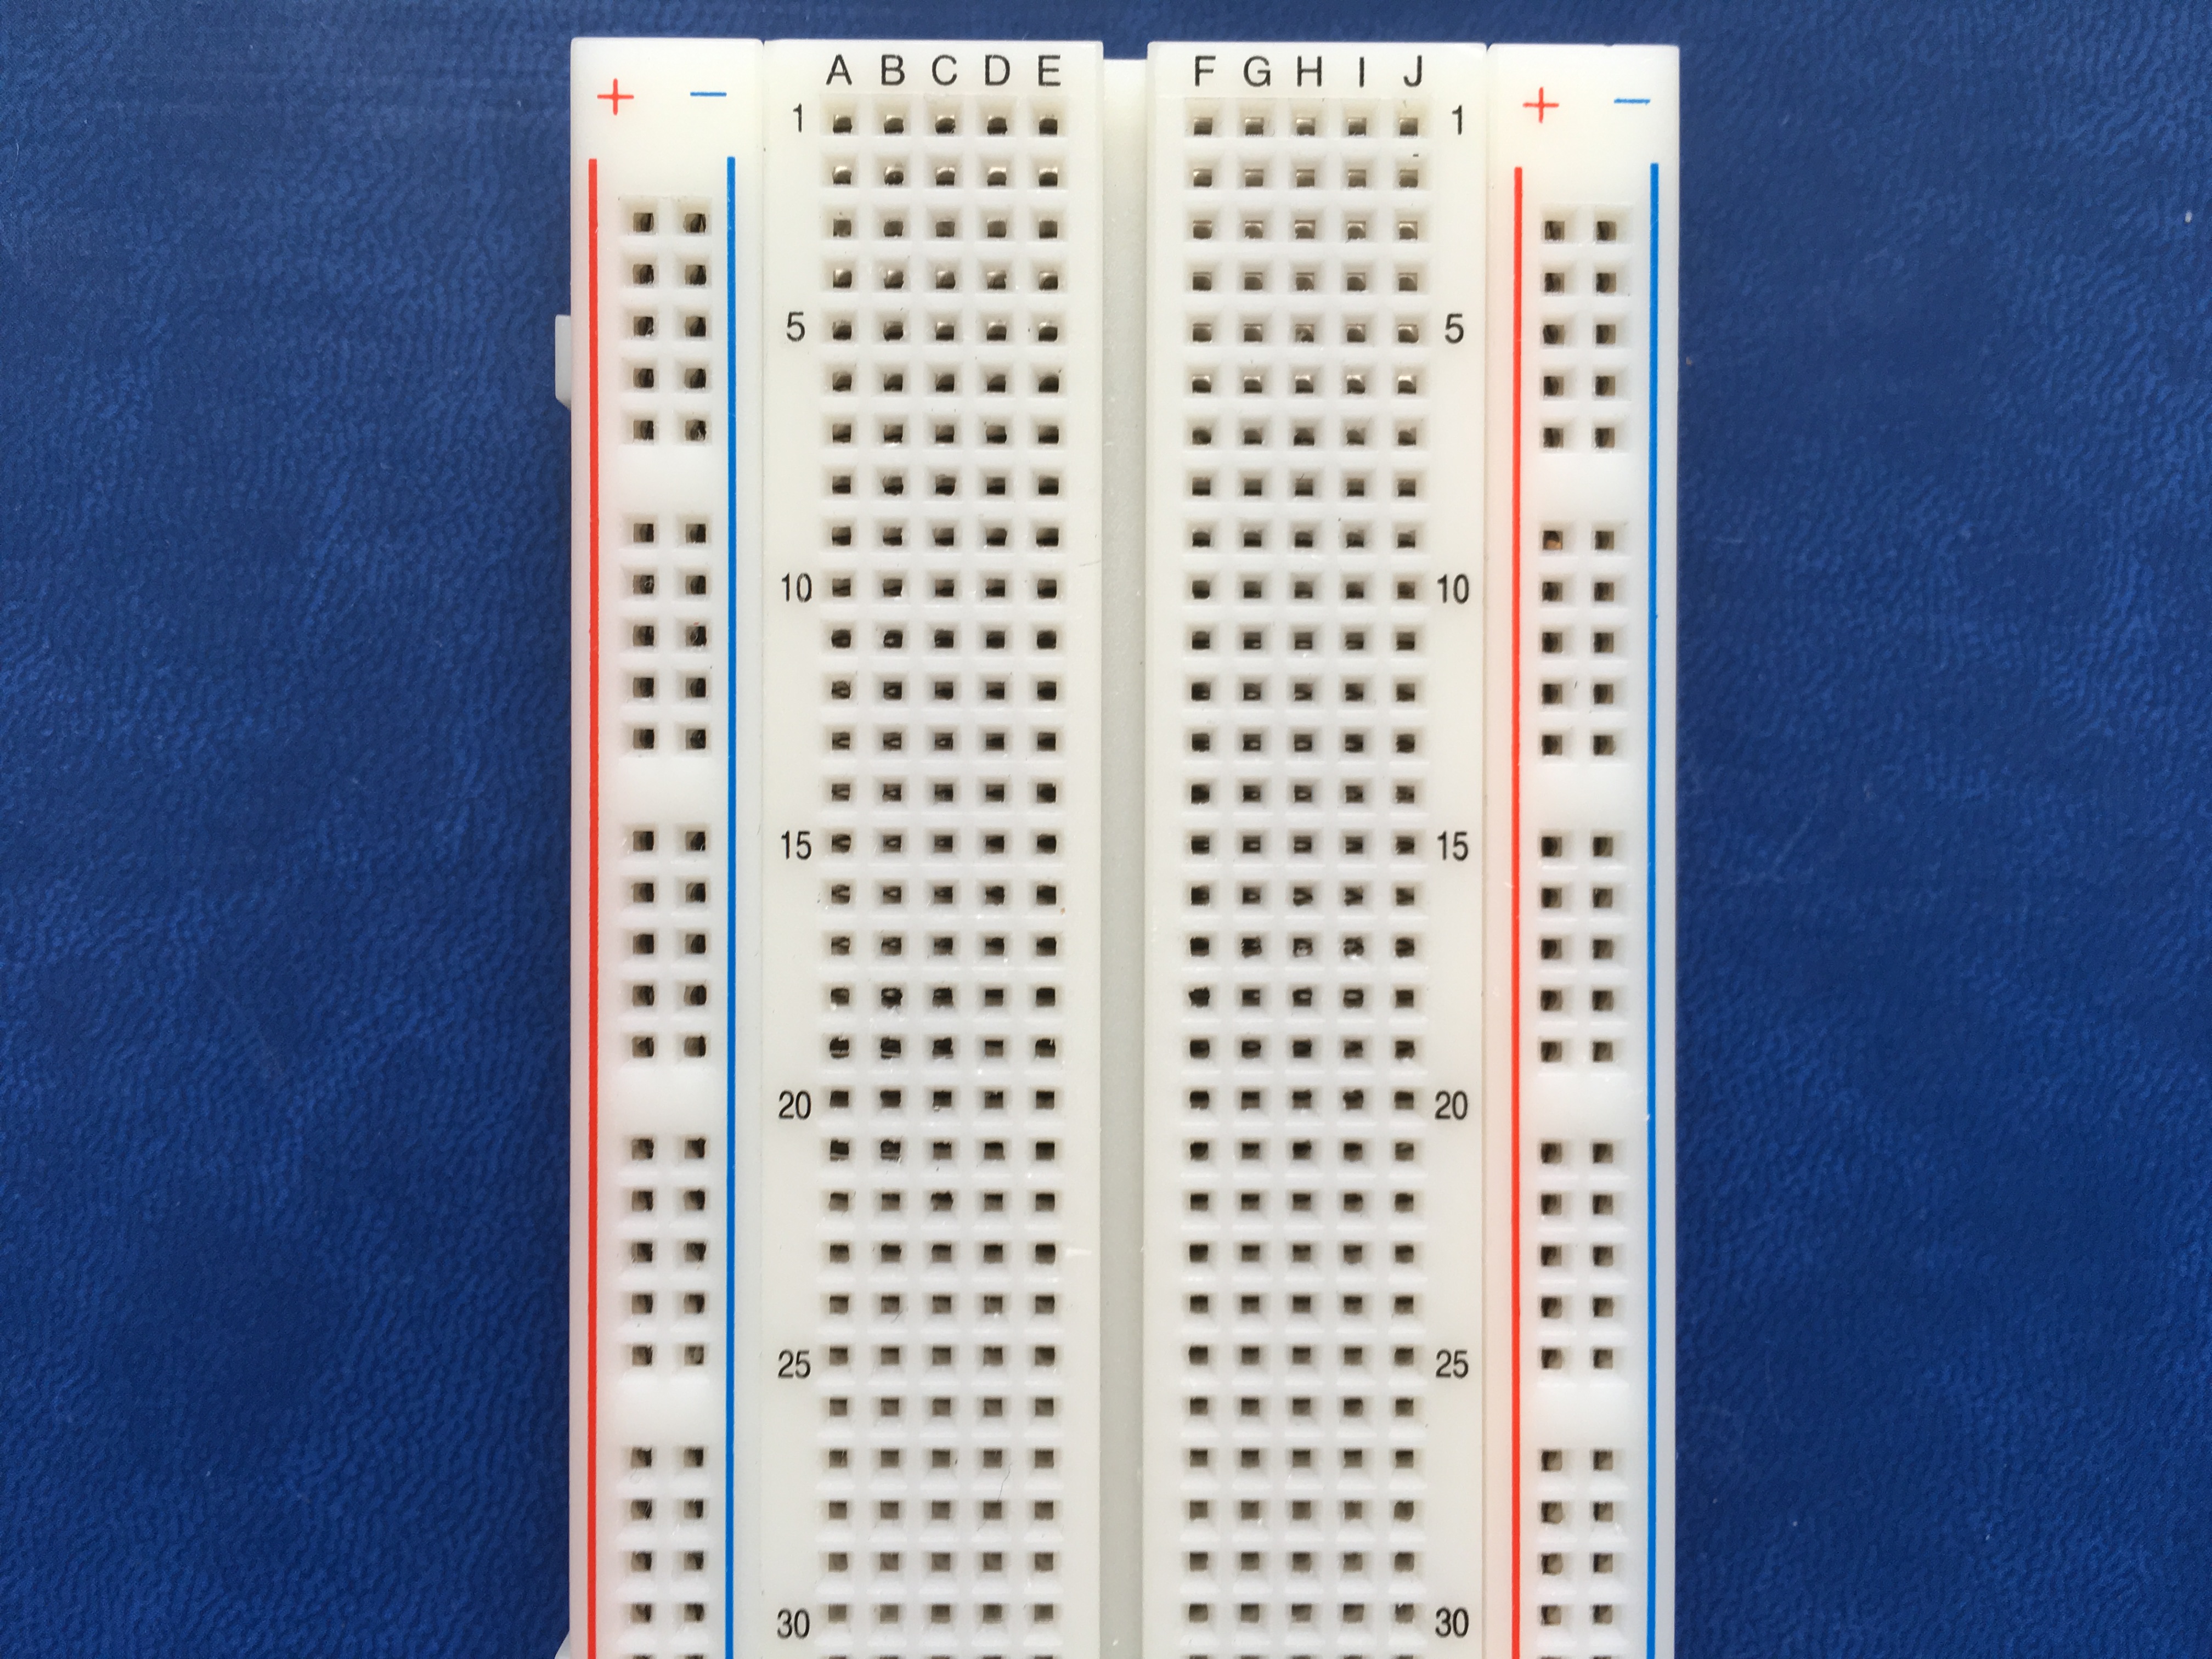
- 1 x Breadboard
- 1 x Rotary potentiometer
- 1 x Tilt switch
- 1 x 10-kilohm resistor (for the tilt switch)
- 1 x 220-ohm resistor (for the LCD backlight)
- Many jumper wires
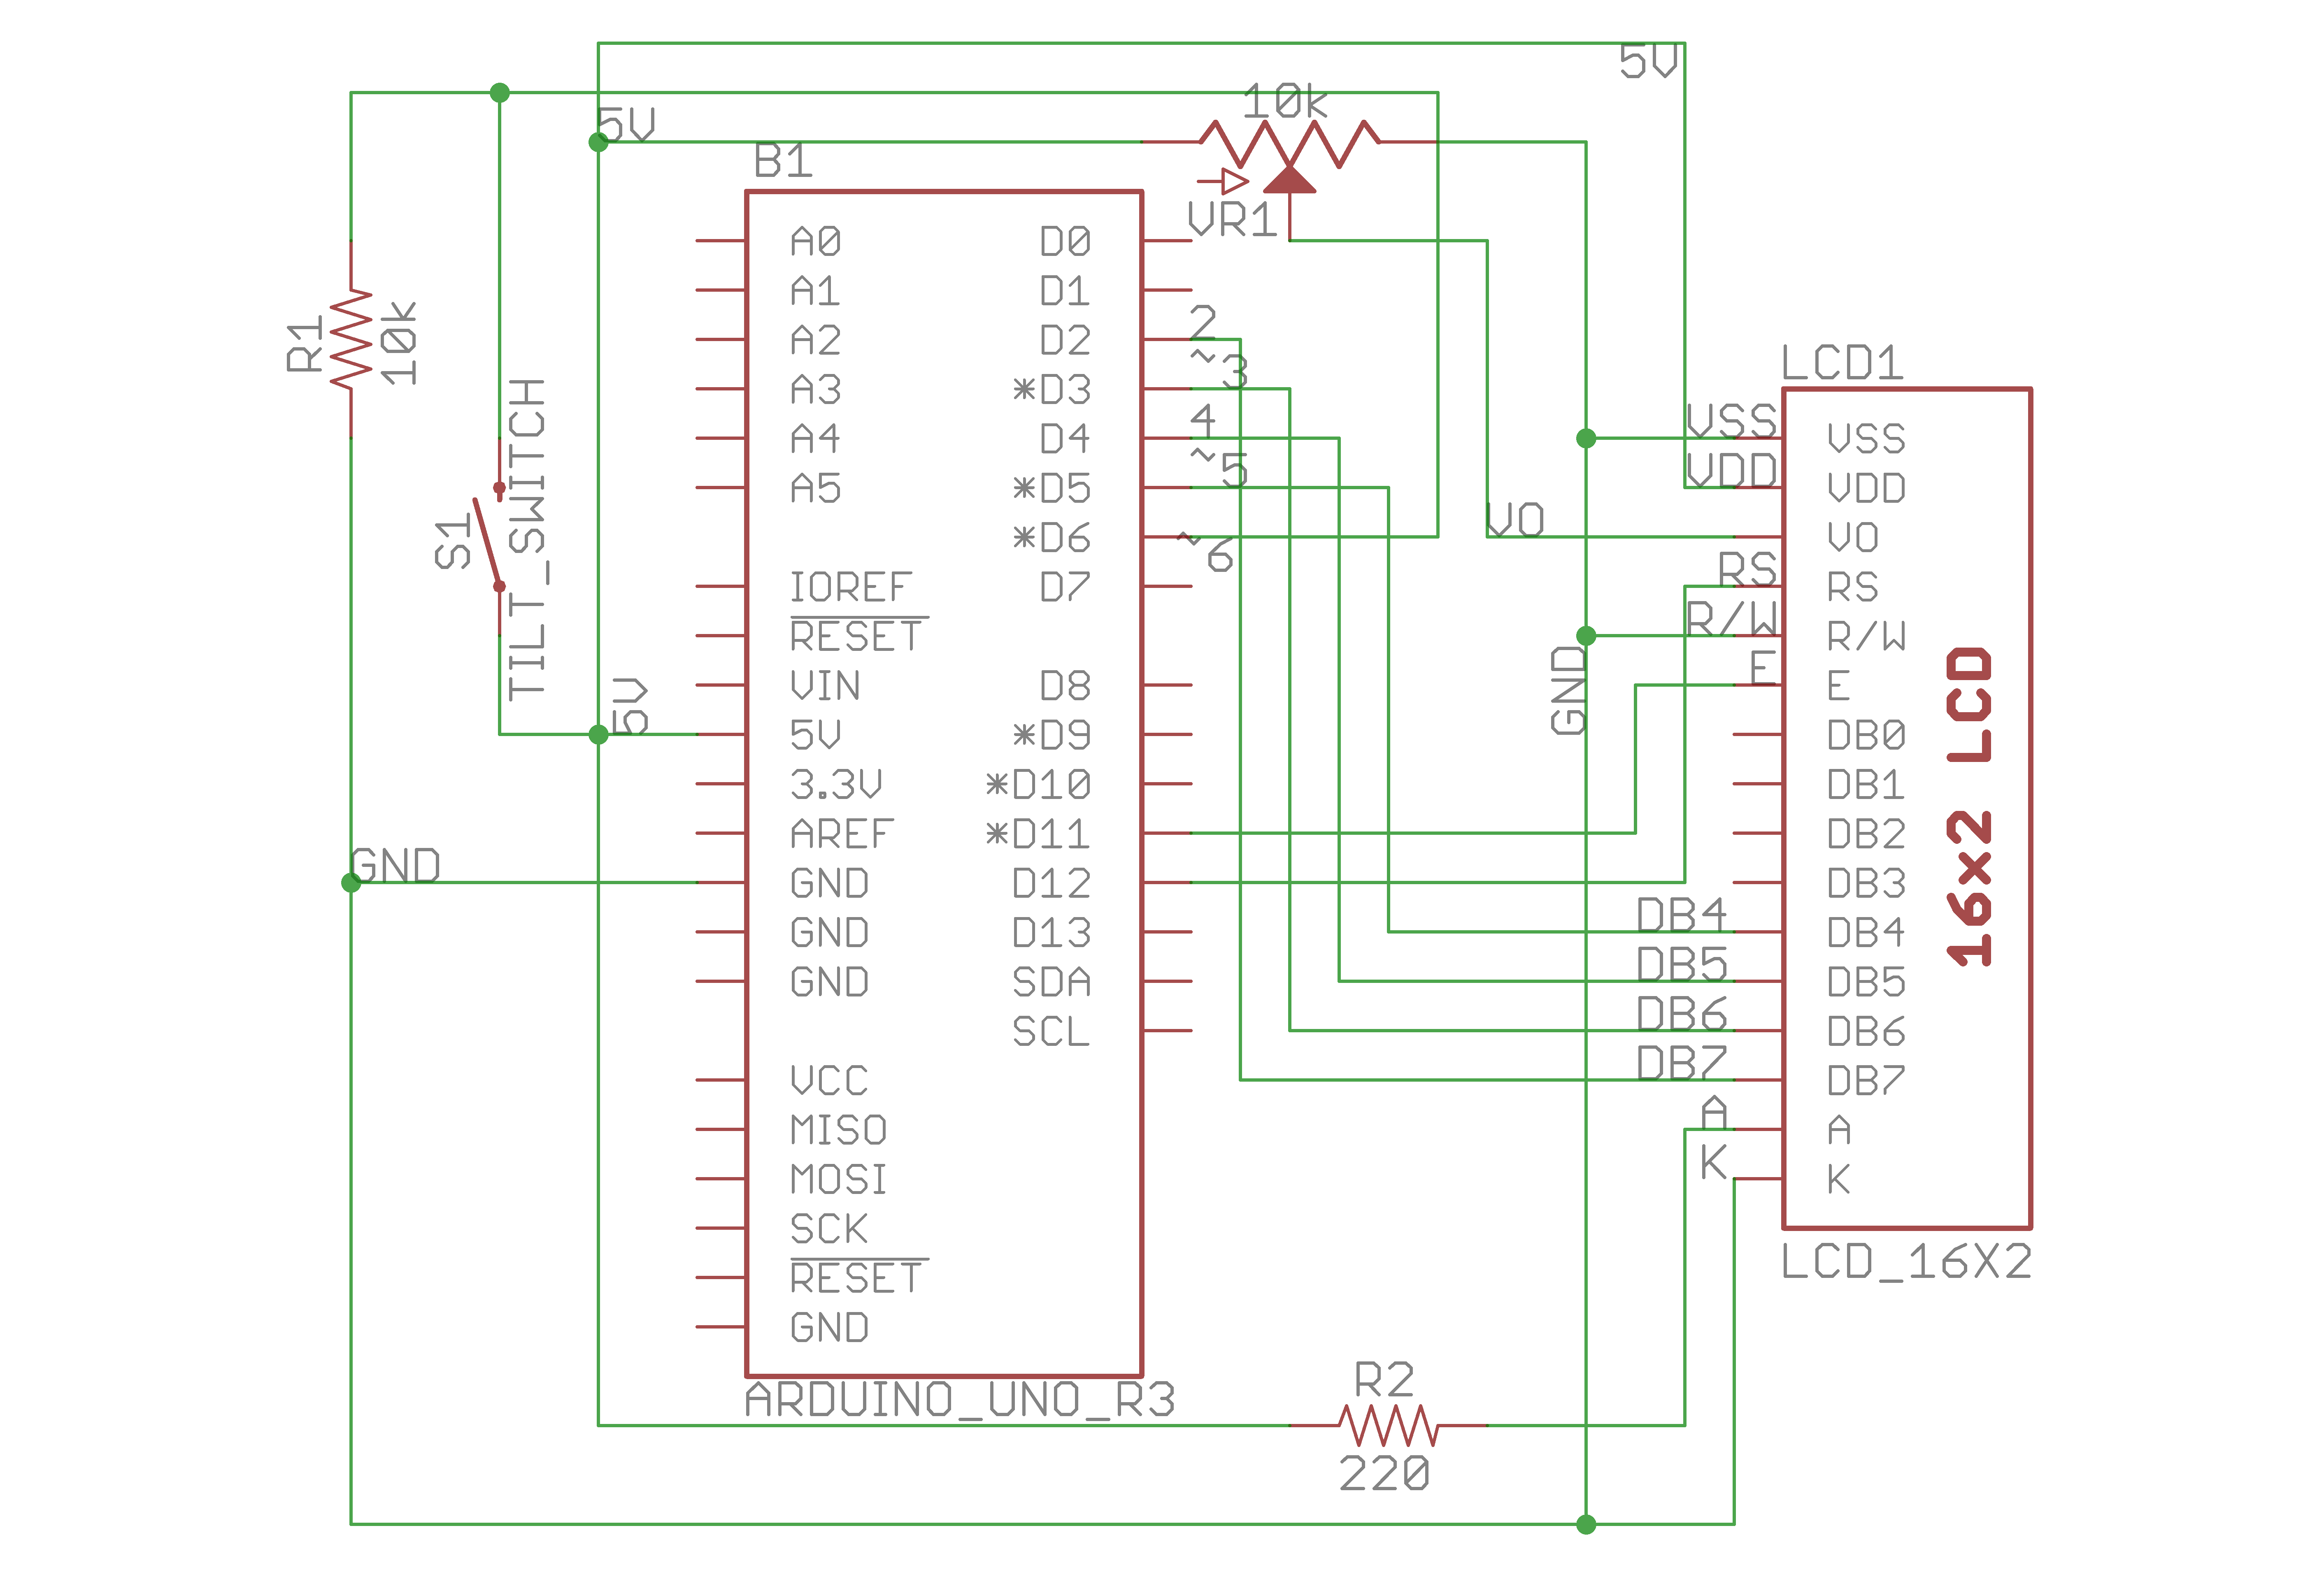
CIRCUIT:
We won’t connect DB0-DB3 to anything; this will be explained in the next section. Here is the schematic, but note that the pinout of the LCD is not always the same as the breadboard layout because schematics make the circuit connection as simple as possible.
This is the breadboard layout. It’s a bit different from the schematic.
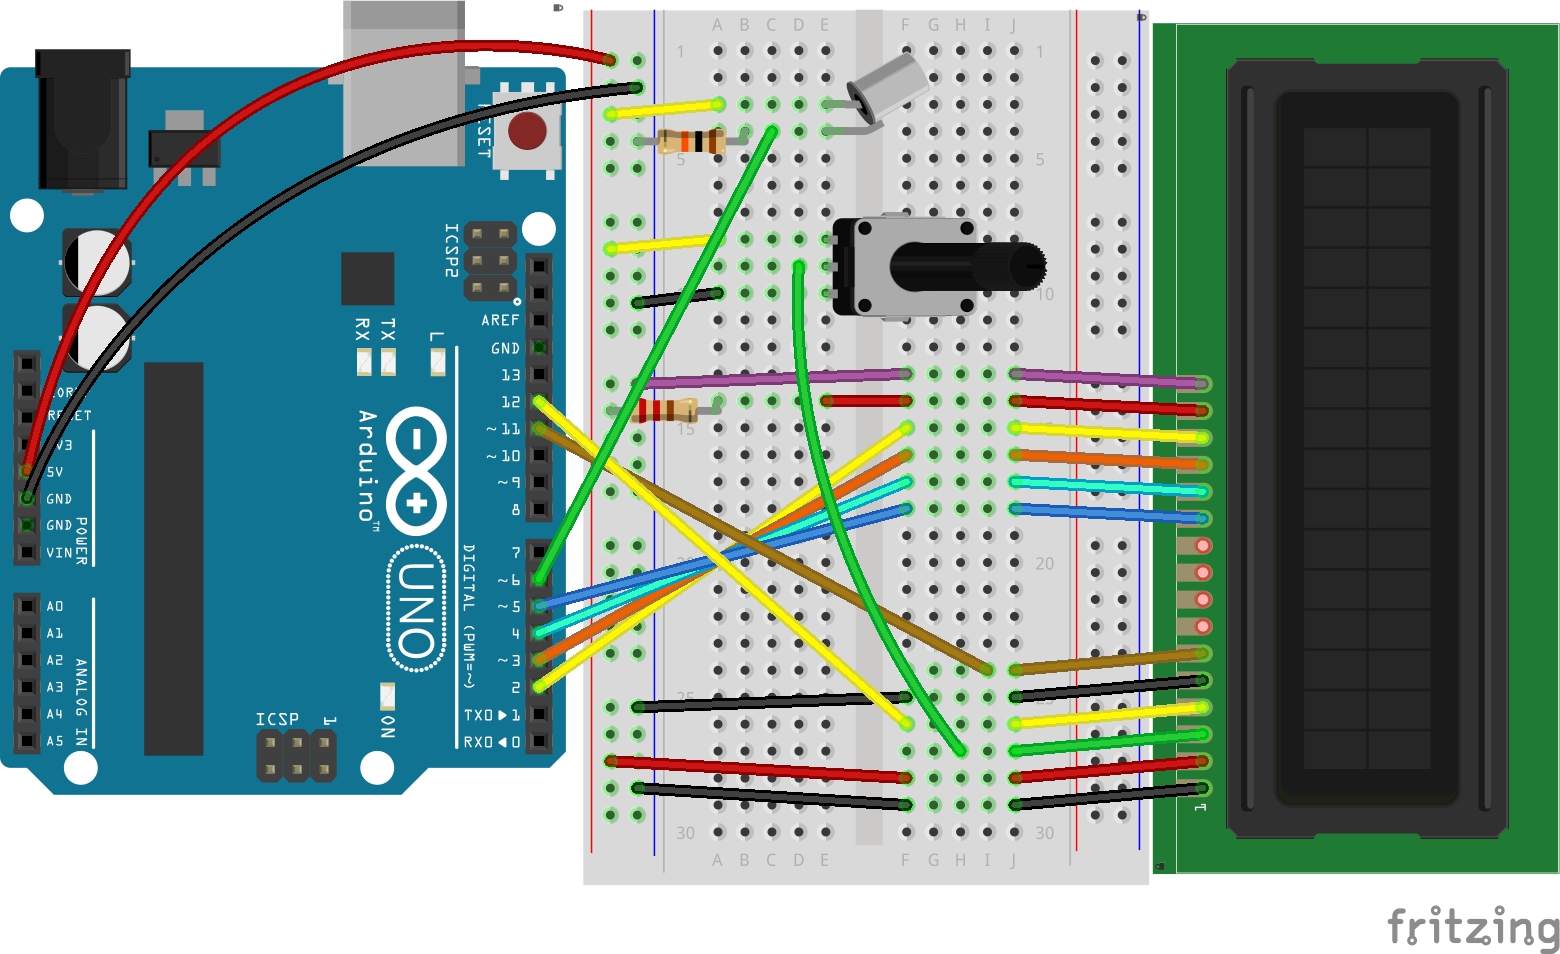
It took me long enough to build the circuit. It’s really complicated at the first look. But just focus on the connection of each pin, it became easier. The circuit looks really messy.

CODE:
In this project, we will use a new library, LiquidCrystal.h. This library provides a full control of the LCD with simple one-line statements. Without it, we would have to code in the registers of the LCD, and that would be a nightmare for beginners like me. So, the first thing we have to do is to include the library,
1
#include LiquidCrystal.h
Right after including, we must use a constructor to tell the compiler which pins of the LCD connect to which pins of the Arduino. There are many choices for the constructor, but I’ll use the following syntax:
1
LiquidCrystal lcd(rs, enable, d4, d5, d6, d7);
with all parameters indicating an Arduino pin connected to the corresponding pin on the LCD sub-circuit. Because we only need RS, E, D4, D5, D6, and D7, there is no reason we need to connect D0-D3. Other pins are necessary for powering and backlighting the LCD, so we need to connect them properly like the schematic.
Additionally, there are more simple one-line statements to control the LCD, such as lcd.write, lcd.setCursor, lcd.print, and lcd.clear. For more information, please visit Arduino.org reference.
One new statement I will introduce in this post is switch(). It’s a conditional statement similar to the if() statement.
1
2
3
4
5
6
7
8
9
10
11
12
13
14
15
switch (variable) {
    case value_1:
        // statements;
        break;
    case value_2:
        // statements;
        break;
    case value_3:
        // statements;
        break;
    // as many cases as we want
    default:
        // statements;
        break;
}
switch() is similar to if(), but it makes the code look when we need to branch the code by different conditions of the same variable. It is important to put a break statement at the end of each case in order to break of the switch() statement when variable falls into one of the values of the cases. If there is no break statement, the code will still fall into one of the cases, but it will continue executing the code of the cases after that. In most situations, it’s not a good idea.
Here is the code:
1
2
3
4
5
6
7
8
9
10
11
12
13
14
15
16
17
18
19
20
21
22
23
24
25
26
27
28
29
30
31
32
33
34
35
36
37
38
39
40
41
42
43
44
45
46
47
48
49
50
51
52
53
54
55
56
57
58
59
60
61
62
63
64
65
66
67
68
69
70
71
72
73
74
75
76
77
78
79
80
81
82
83
84
85
86
87
/**
 * Project Name: Arduino Projects Book - Project 11: Crystal Ball
 *
 * File Name: crystal_ball.ino
 *
 * Description: Uses the LCD to help "predict" the future when tilting the
 * tilt switch.
 *
 * Author: Zhengqi Dong
 * Location:
 * Created: August 26, 2016
 * Updated: June 22, 2017
 */

#include <span><</span>LiquidCrystal.h<span>></span>

// Required hardware I/O connections
const byte LCD_D7     = 2;  // connect D7 of the LCD to 2
const byte LCD_D6     = 3;  // connect D6 of the LCD to ~3
const byte LCD_D5     = 4;  // connect D5 of the LCD to 4
const byte LCD_D4     = 5;  // connect D4 of the LCD to ~5
const byte LCD_E      = 11; // connect E of the LCD to ~11
const byte LCD_RS     = 12; // connect RS of the LCD to 12
const byte SWITCH_PIN = 6;  // connect the tilt switch to ~6

// LiquidCrystal(rs, enable, d4, d5, d6, d7)
LiquidCrystal Lcd(LCD_RS, LCD_E, LCD_D4, LCD_D5, LCD_D6, LCD_D7);

// Global constants
const byte LCD_WIDTH  = 16;
const byte LCD_HEIGHT = 2;

// Global variables
byte switch_val      = 0;
byte prev_switch_val = 0;
byte reply           = 0; // varies from 0 to 7

void setup() {
    Lcd.begin(LCD_WIDTH, LCD_HEIGHT);
    pinMode(SWITCH_PIN, INPUT);
    // intro message
    Lcd.setCursor(0, 0);
    Lcd.print("Ask the");
    Lcd.setCursor(0, 1);
    Lcd.print("Crystal Ball!");
}

void loop() {
    switch_val = digitalRead(SWITCH_PIN);

    if ((switch_val != prev_switch_val) && (switch_val == LOW)) {
        reply = random(8); // randomly choose 1 out of 8 anwers
        Lcd.clear();
        Lcd.setCursor(0, 0);
        Lcd.print("The ball says...");
        delay(1000);
        Lcd.setCursor(0, 1);

        switch (reply) {
            case 0:
                Lcd.print("Absolutely");
                break;
            case 1:
                Lcd.print("Probably");
                break;
            case 2:
                Lcd.print("Maybe");
                break;
            case 3:
                Lcd.print("Yep");
                break;
            case 4:
                Lcd.print("Unsure");
                break;
            case 5:
                Lcd.print("Foolish Question");
                break;
            case 6:
                Lcd.print("Who knows");
                break;
            case 7:
                Lcd.print("Impossible");
                break;
        }
    }
    prev_switch_val = switch_val;
}
