This project, we will use a servo motor to mak a mechanical gauge to point out what sort of mood you’re in that day!
- Time: 1 hour
- Level: 2 (1-5)
- Build on Projects: 1, 2, 3, 4
PREPARATION:
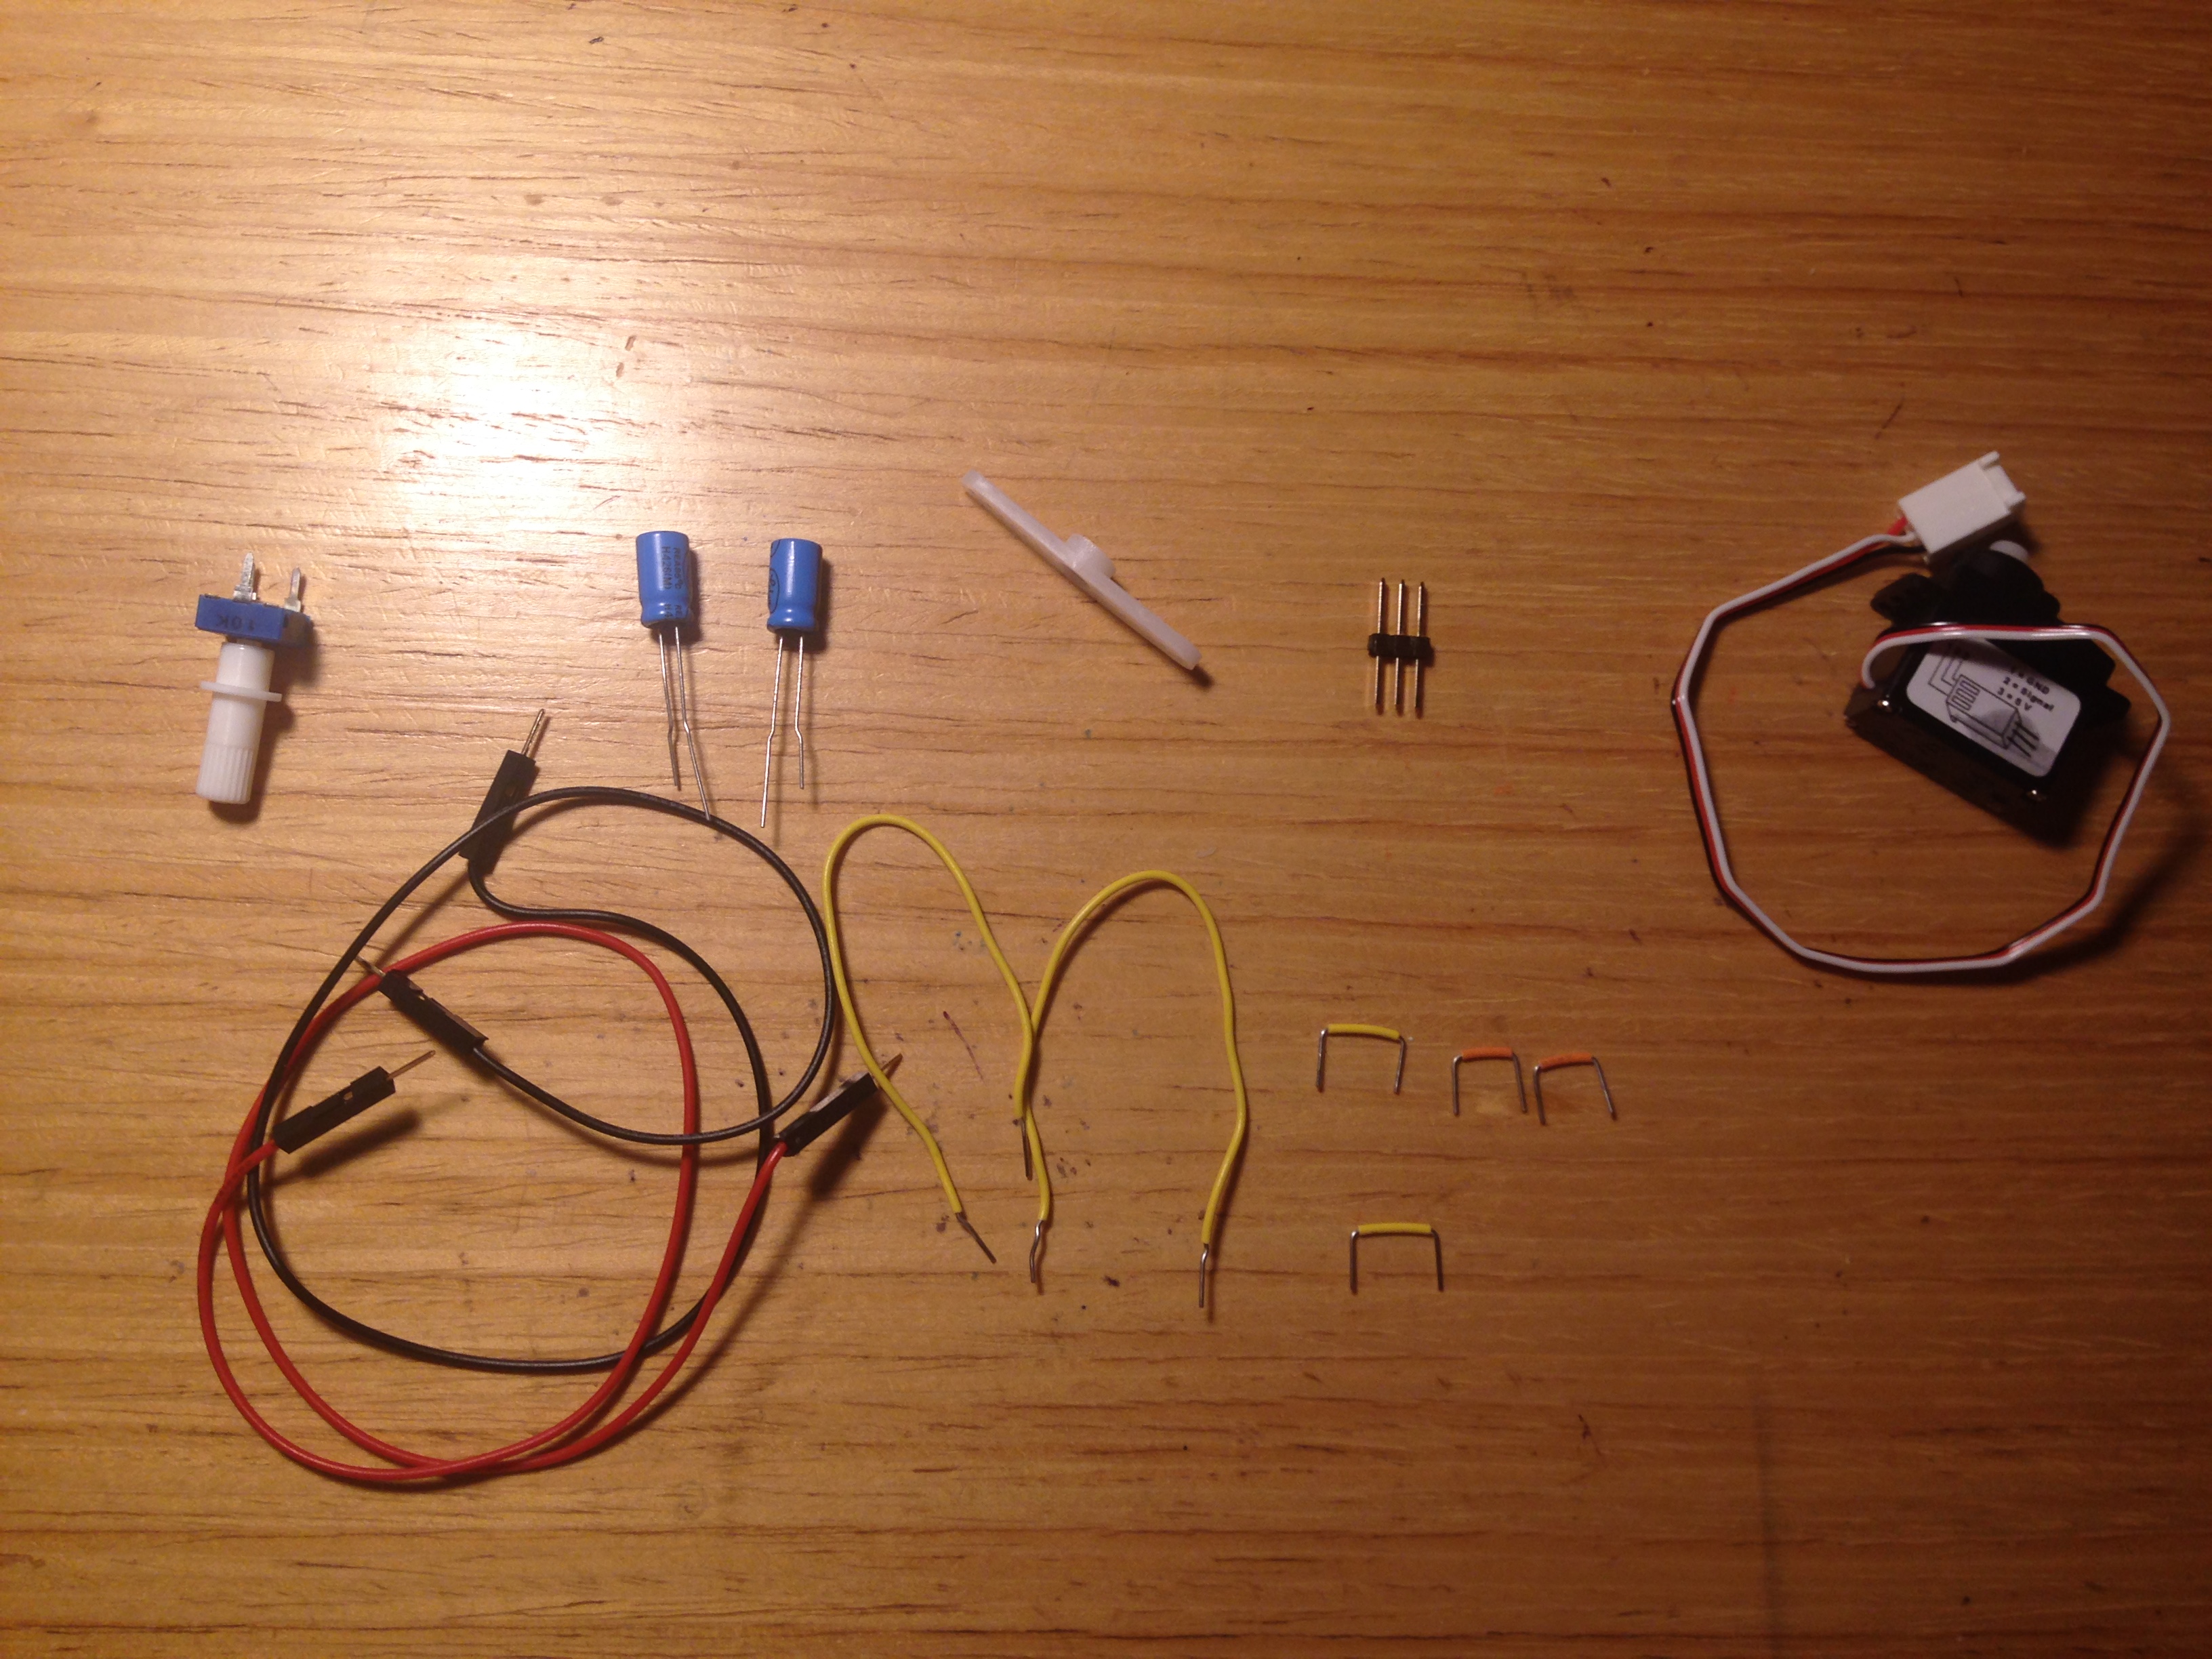
- 1 x Arduino
- 1 x Breadboard
- 8 x Jumper wires
- 2 x 100-microFarad capacitors
- 1 x Potentiometer
- 1 x Servo motor
- 3 x Male headers (sticking together)
Servo motor:
BUILDING THE CIRCUIT:
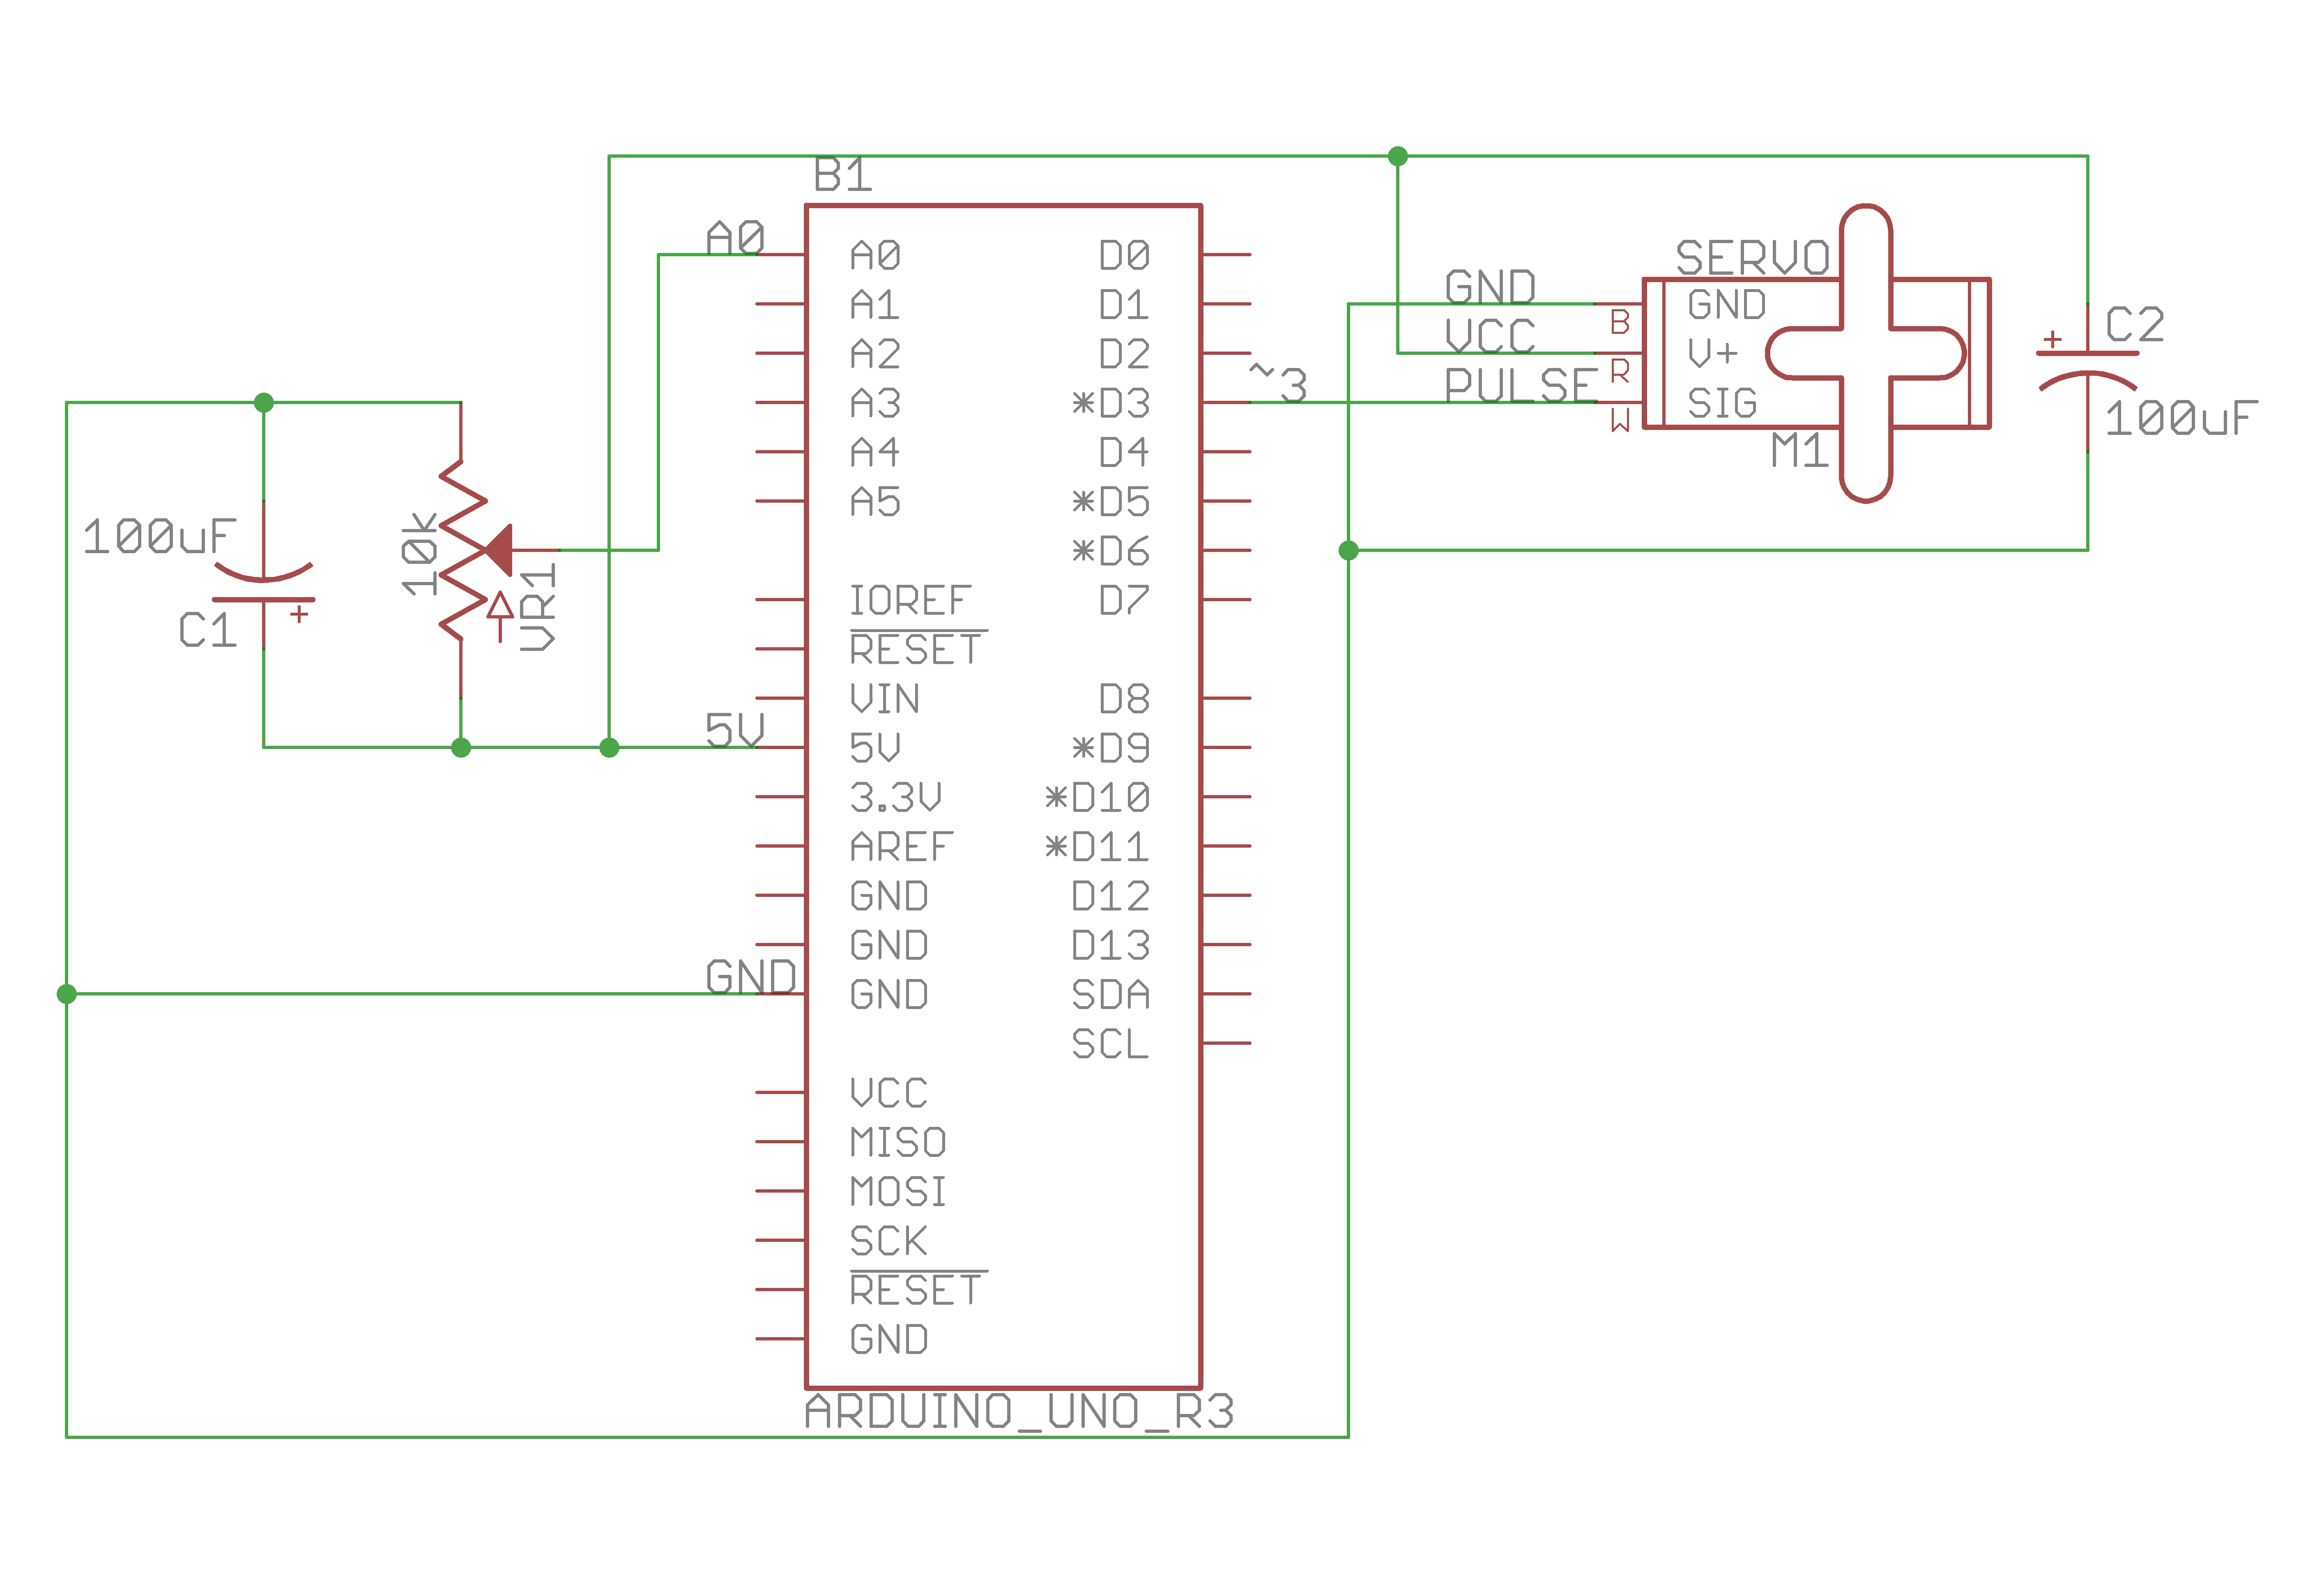
The servo motor draws more current when it is in motion. This will cause a dip in voltage on the board. By placing a 100-microFarad capacitor across 5V and GND of the servo, we can smooth out any voltage changes that may occur.
Here is my schematic:
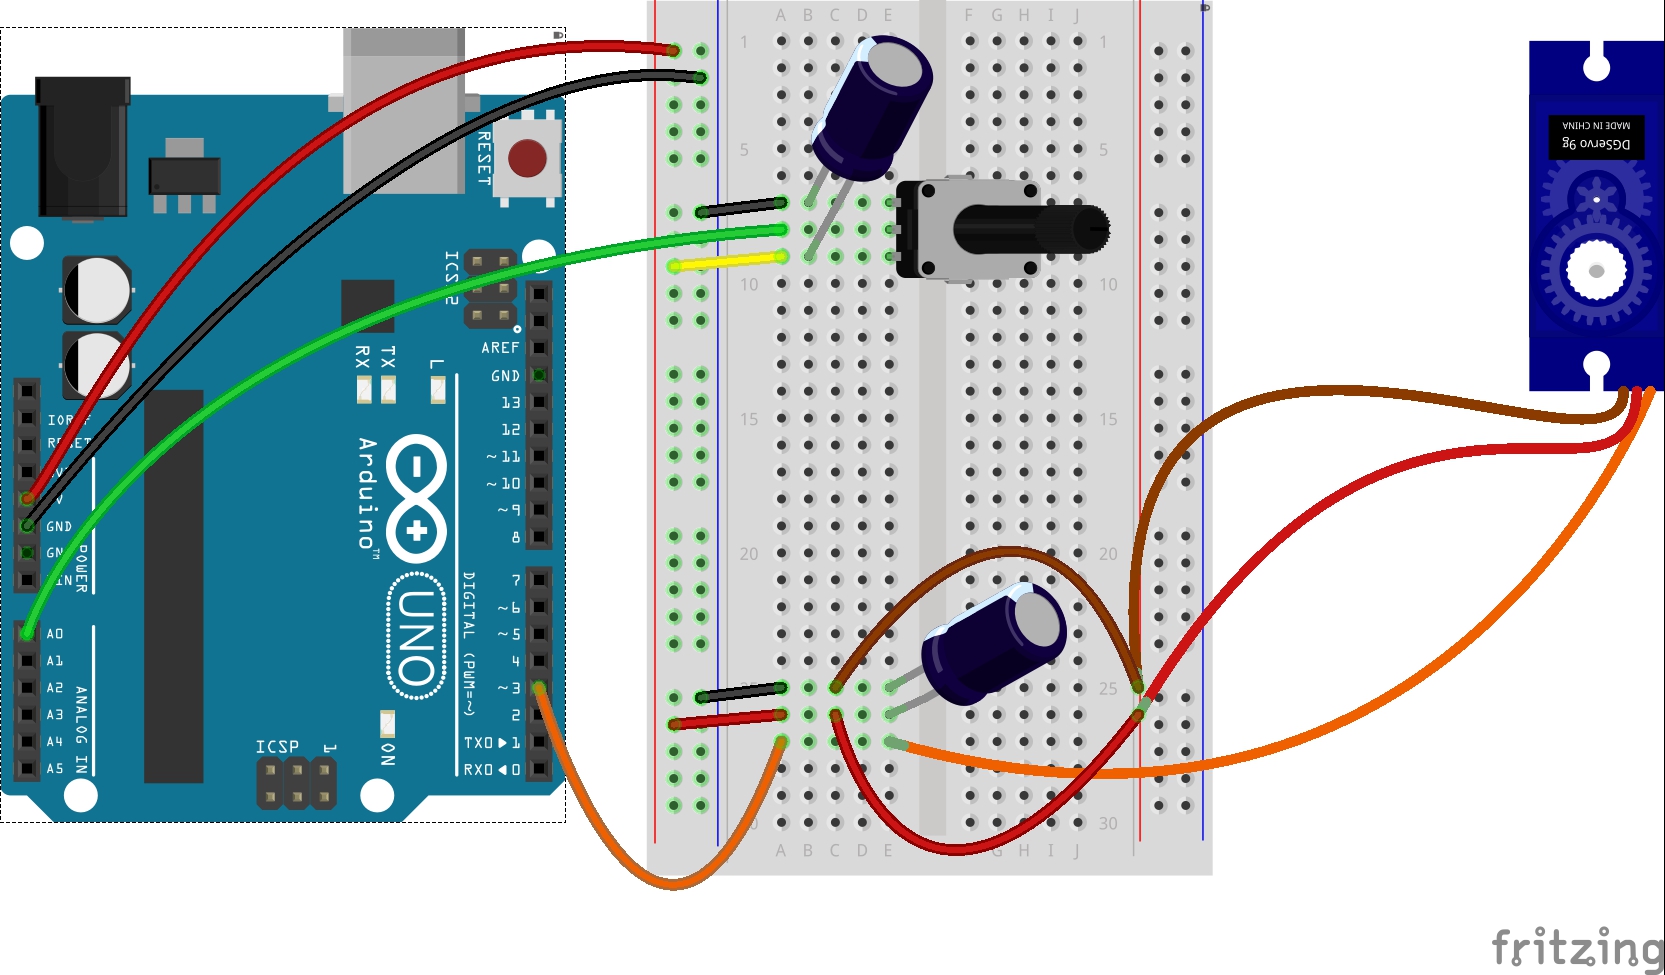
Here is my breadboard layout from Fritzing:
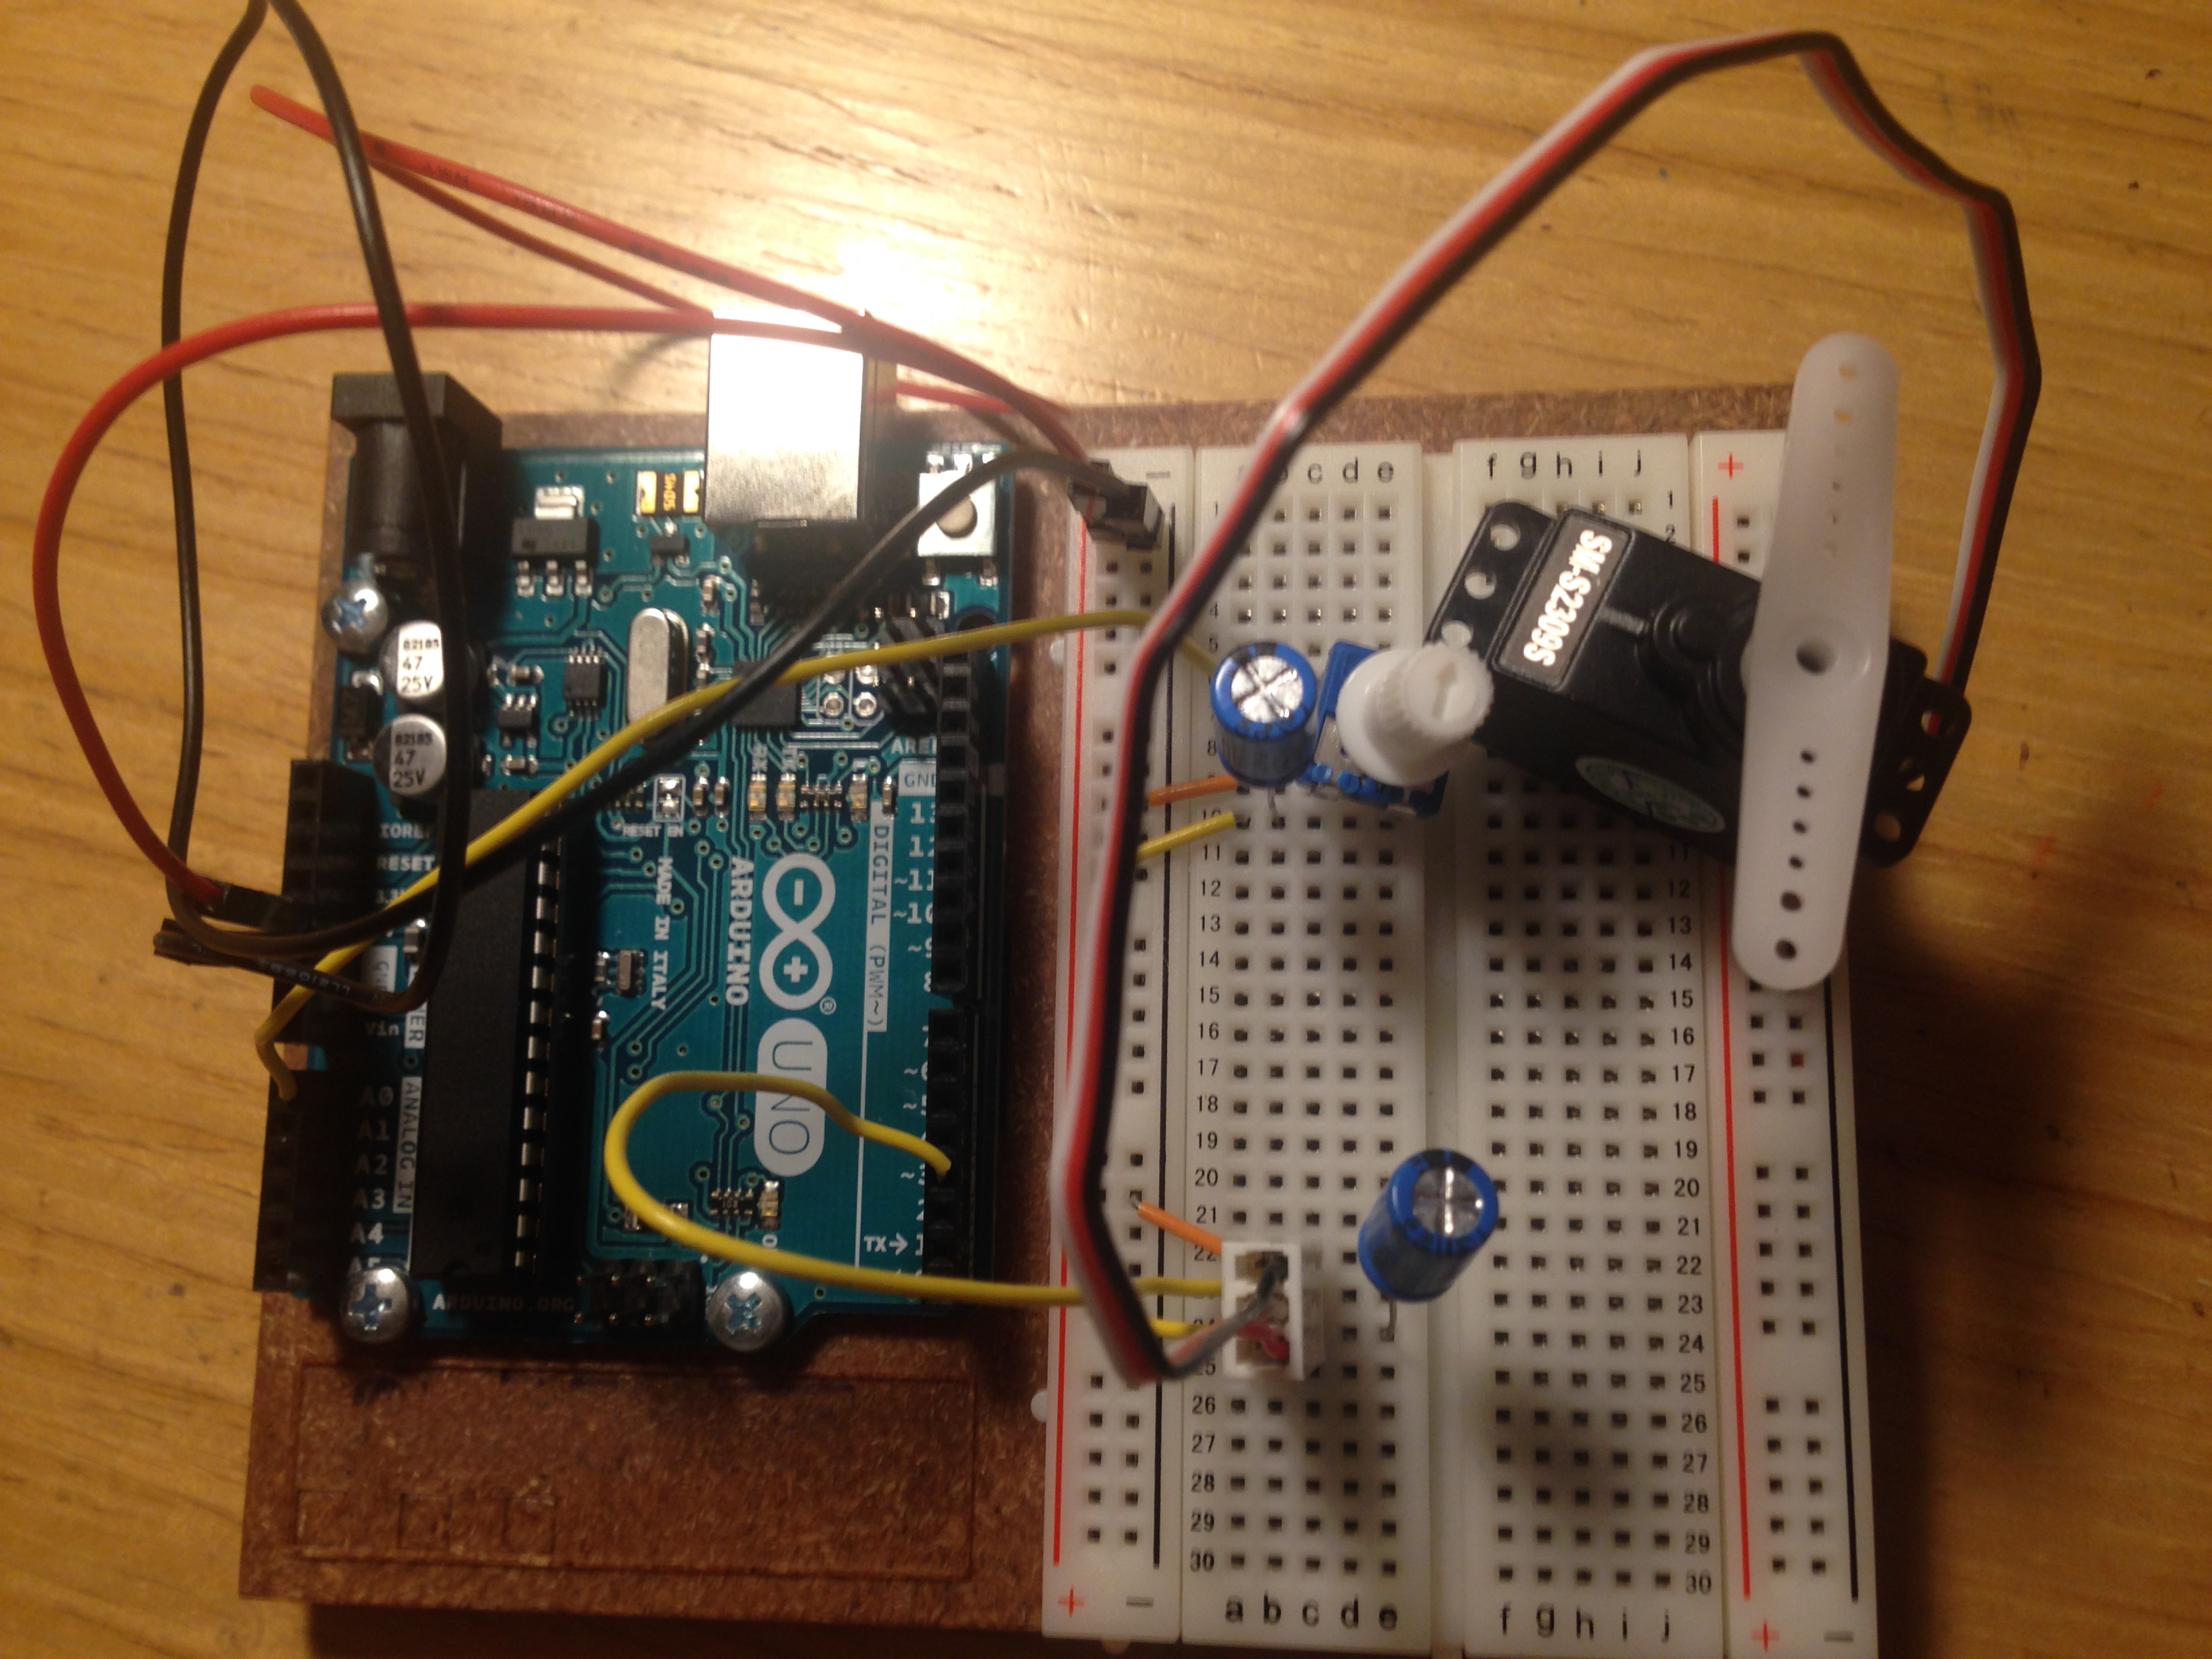
Lastly, this is my circuit board:
THE CODE:
In addition to starting the Serial Monitor and reading the analog and controlling the Servo Motor, map() is a function that helps remap a number from one range to another.
map(value, from_low, from_high, to_low, to_high);
A value of from_low will be mapped to to_low. A value of from_high will be mapped to to_high. A value in between from_low and from_high will be mapped to a different value between to_low and to_high. A great usage of this function is to map a value collected by a photocell (ranging between 0 and 1023) to a value that output to an RGB LED (ranging between 0 and 255): red_led_val = map(red_photo_val, 0, 1023, 0, 255); (remember the previous project?).
Next, we need to include the Servo library so that we can work on our servo motor easily. After we #include <Servo.h> and declare Servo MyServo, we provide the servo motor with attach() and write() methods.
1
2
3
4
5
6
#include <span><</span>Servo.h<span>></span>

Servo MyServo;

MyServo.attach(SERVO_PIN);  // the Arduino pin that controls the servo
MyServo.write(90);          // write the angle
Here is the code:
/**

 * Project Name: Arduino Projects Book - Project 05: Mood Cue
   *
 * File Name: mood_cue.ino
   *
 * Description: Expresses your feeling by a servo motor.
   *
 * Author: Zhengqi Dong
 * Location:
   */

// include Servo library for servo motors
#include <span><</span>Servo.h<span>></span>

// Required hardware I/O connections
const byte POT_PIN   = A0;           // connect potentiometer to A0
const byte SERVO_PIN = 3;            // connect servo motor to ~3

// Servo class
Servo MyServo;                       // declare MyServo

// Global constants
const unsigned int BAUD_RATE = 9600; // serial monitor's baud rate

// Global variables
unsigned int  pot_val;               // potentiometer
unsigned char angle;                 // servo's angle

void setup() {
    MyServo.attach(SERVO_PIN);       // attach MyServo into SERVO_PIN
    Serial.begin(BAUD_RATE);         // start the Serial Monitor
}

void loop() {
    // read & print potentiometer value
    pot_val = analogRead(POT_PIN);
    Serial.print("pot_val: ");
    Serial.print(pot_val);
    // map & print from pot value to angle
    angle = map(pot_val, 0, 1023, 0, 179);
    Serial.print(", angle: ");
    Serial.println(angle);
    // run the servo by the angle
    MyServo.write(angle);
    // delay to stabilize
    delay(15);
}
WRAP UP:
map() is a great function which helps mapping a value from one range to another. The <Servo.h> is also a useful library as it makes servo control much easier. I didn’t simulate the door’s mood indicator because it was hard to glue the servo on the door with the Arduino controlling it from the inside (I would possibly have to drill a hole on the door for wiring). But anyways, it’s been the fifth project of the Arduino Projects Book - Mood Cue.
