Motivation
Imagine a situation where the Flash floods swept through your hometown, and your house was surrounded by the water, What to do?

What might be a easy way to send a helping message? ==> S.O.S
But, next question is how you want to send it?
- Write a message in your house? –> What about the hylicoptor flighting at night?
- Using flashlight as indicator? –> Cool, but are you gonna standing at your house and doing this whole day?
Now, let me show you a good idea to achieve this with an Arduino board, a couple of LED lights, some resistors, and some wires. After finish this lab, you will be able to implement this on your own less than an hour!
Idea:
Encode the S.O.S message as Morse code, and repeatefly flash the LED at specific frequency!
Specifically, Here is the Morse code translation:
- S –> “…” –> 2 milisecond flash
- O –> “- - -“ –> 5 milisecond flash
In this example, I used 2 milisecond flash to represent “.”, and 5 milisecond flash to represent “-“. Then, you just throw this into a loop, Power up the kits, Open a favorite TV channel, and Waiting for the help!
Lab Setup:
Supplies:
- Switch
- 3 LED light
- 3 220-ohm Resistors
-
1 10-kilohm Resistor
DESIGN THE CIRCUIT:
Circuit Diagrams and Schematic Diagrams:
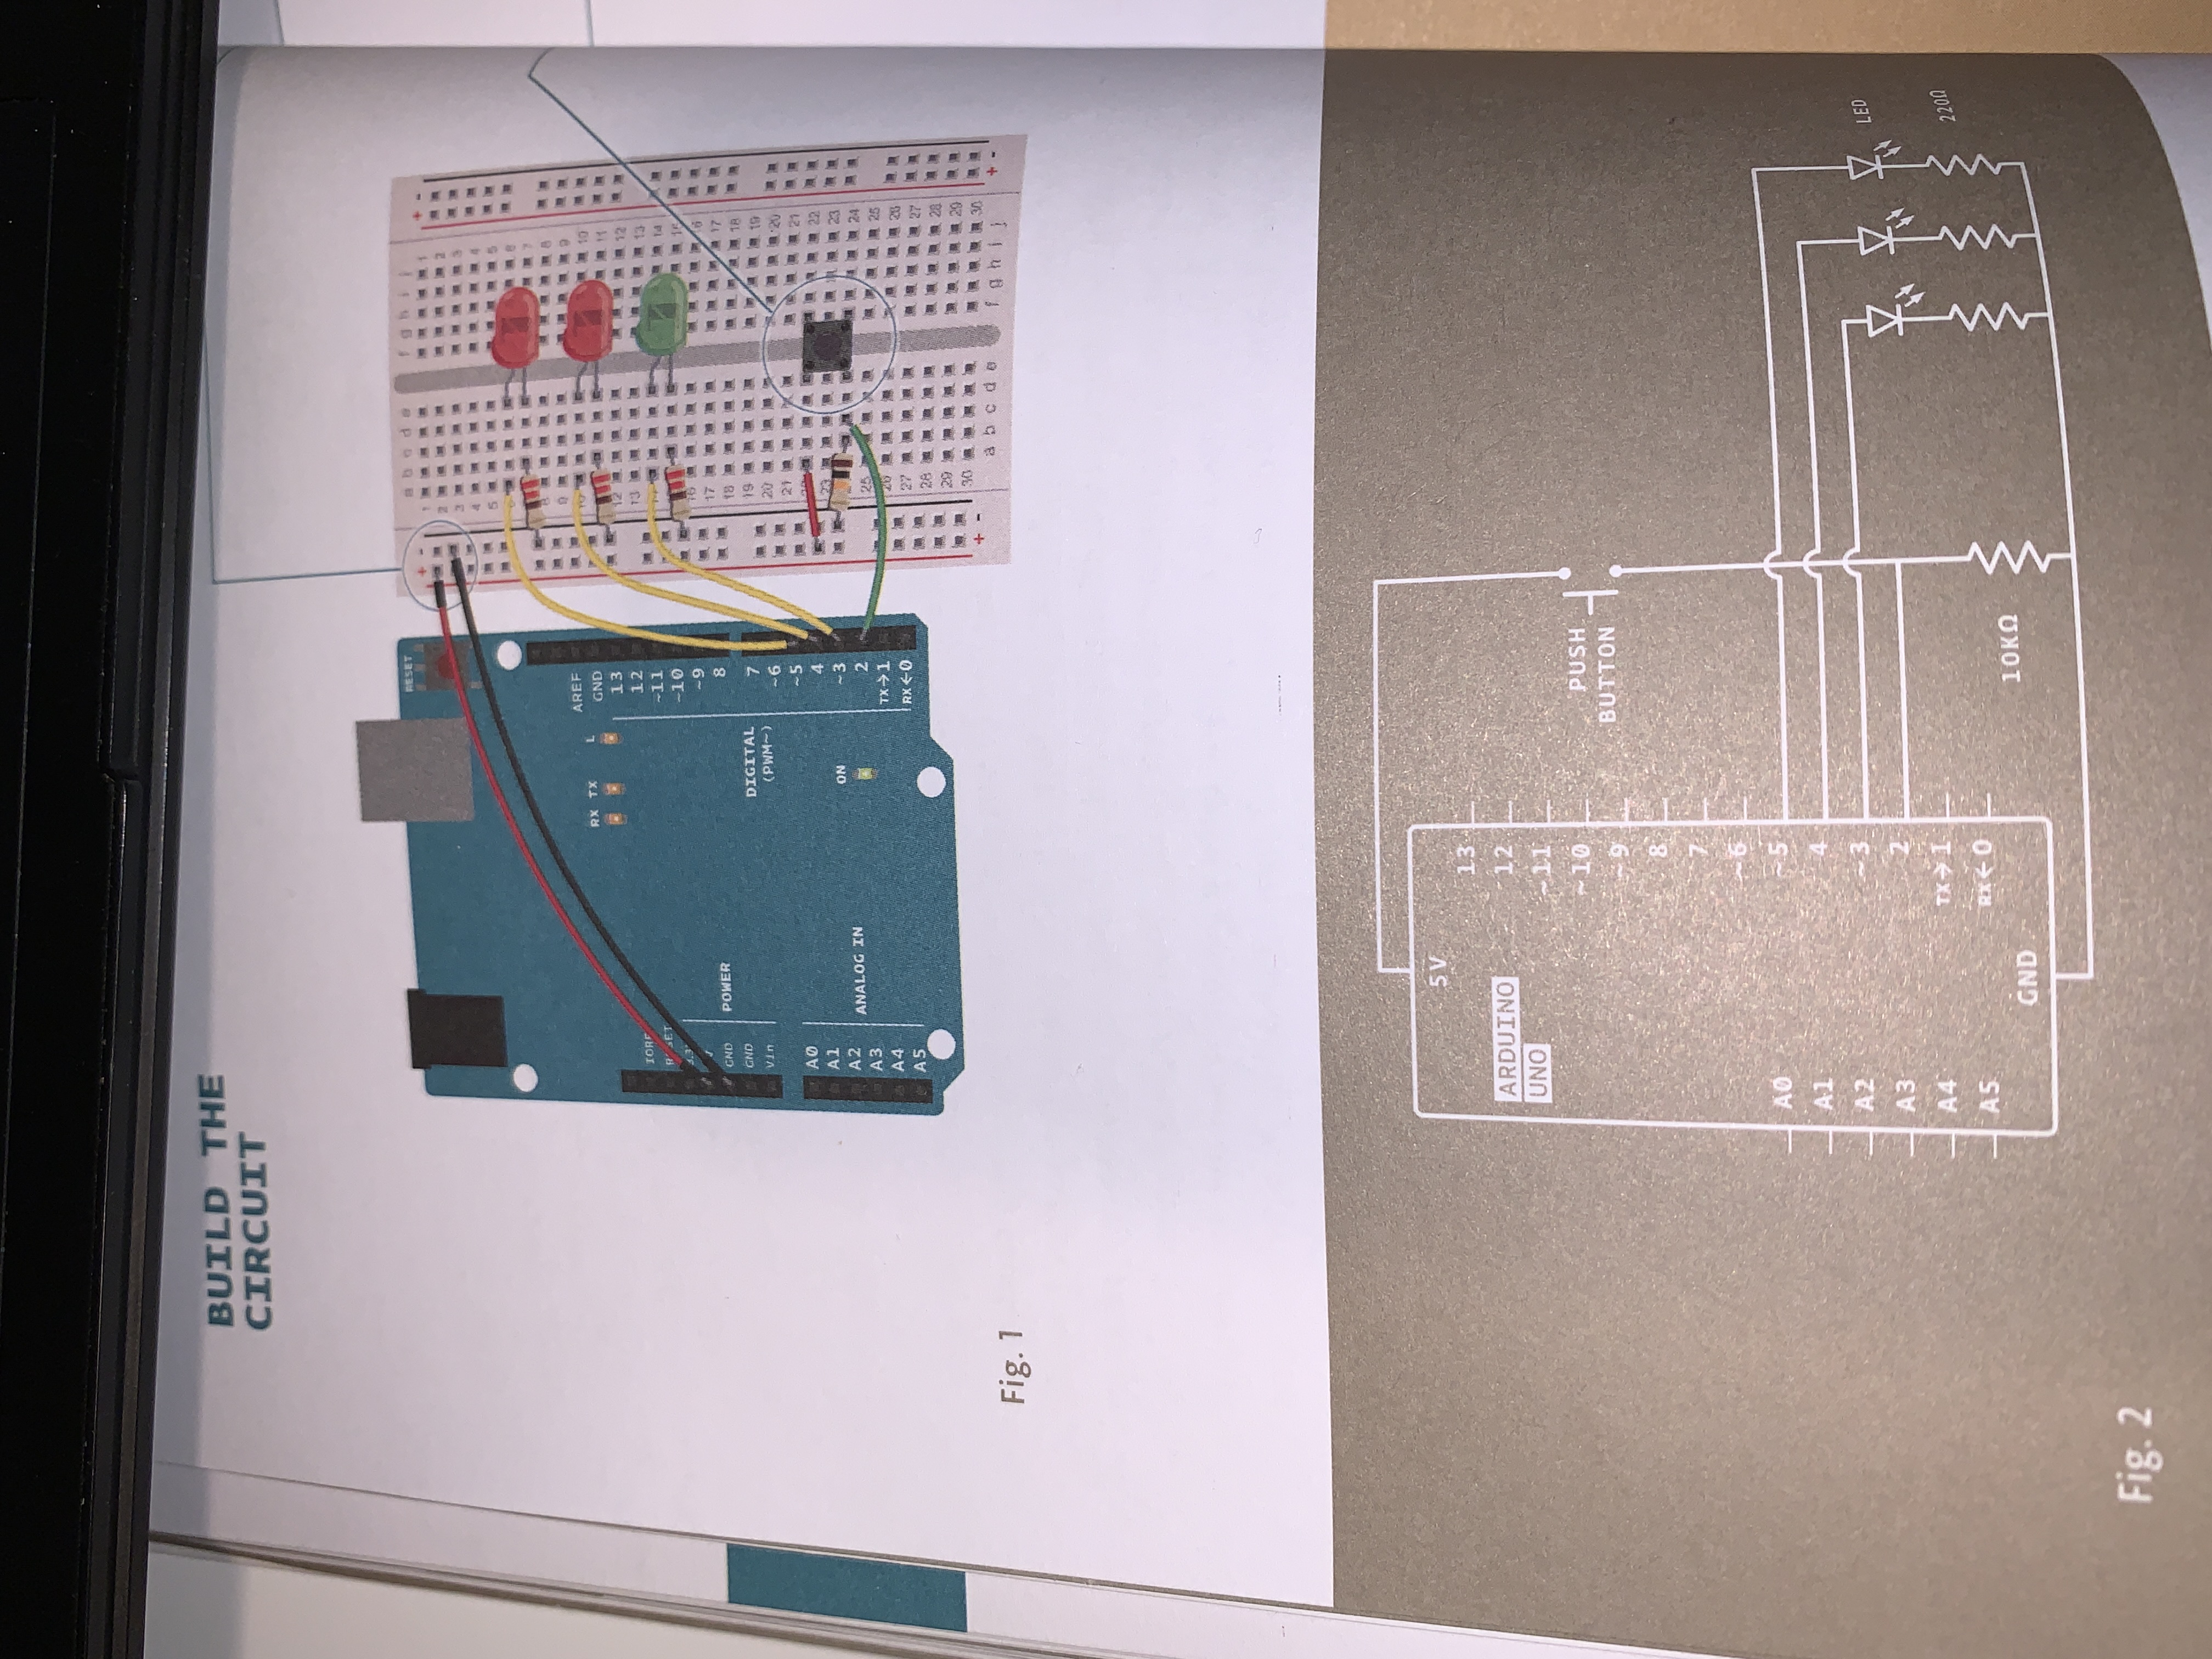
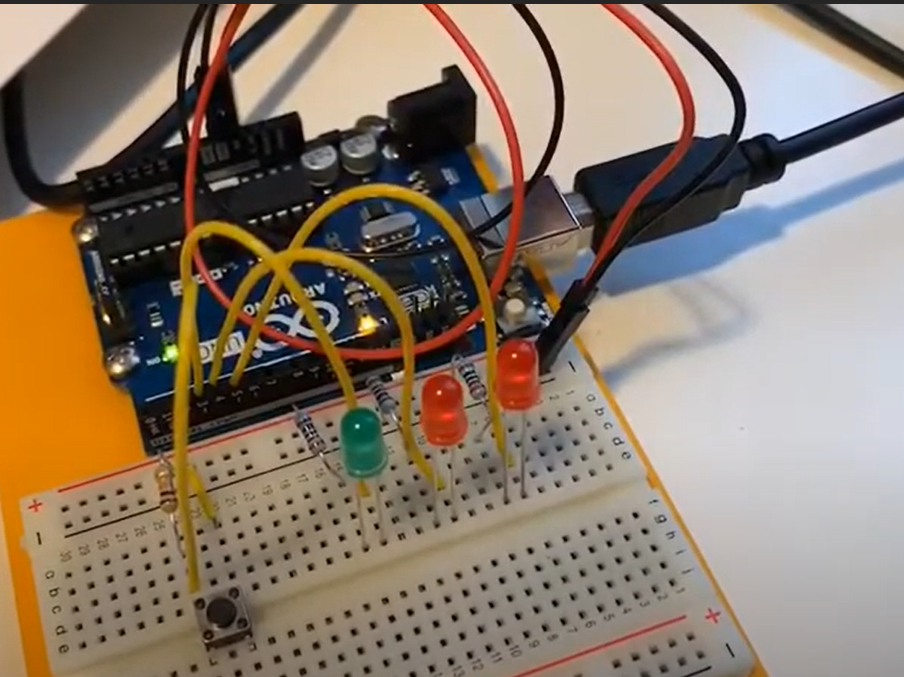
The actually setup:
THE CODE:
pinMode(pin, state);
You use function pinMode() whenever you have a wire connected to the Arduino board, and you want to specify whether you want to use it as input or output. For example: pinMode(3, OUTPUT) says “set pin3 as output”.
digitalRead(pin);
digitalWrite(pin, state);
Telling Arduino which pin you want to turn on/off? Ex. digitalWrite(3, HIGH), says “turn on the the LED connected at pin3”.
Here are the entire code that I used:
1
2
3
4
5
6
7
8
9
10
11
12
13
14
15
16
17
18
19
20
21
22
23
24
25
26
27
28
29
30
31
32
33
34
35
36
37
38
39
40
41
42
43
44
45
46
47
48
/**
 * Project Name: Arduino Projects Book - Project 02: SOS -- Morse Code Emergence Distress Singal
 * File Name: Project2_SOS_LED_version.ino
 * Description:
 * Author: Zhengqi Dong
 * Created:
 * Updated:
 */
 #define ledPin 4

int duration[] = {200, 200, 200, 500, 500, 500, 200, 200, 200};
int swtichState = 0;
void setup() {
  pinMode(2, INPUT);
  pinMode(3, OUTPUT);
  pinMode(4, OUTPUT);
  pinMode(5, OUTPUT);
}

/* Function: blink the red LED when button is pressed. */
void loop() {
  swtichState = digitalRead(2);
  if(swtichState == LOW){
    digitalWrite(3, HIGH);  //green LED
    digitalWrite(4, LOW);   //red LED
    digitalWrite(5, LOW);   //red LED
  }else{ //button is pressed
    digitalWrite(3, LOW);
    int i;
    for(i =0; i<9; i++){
      flash(duration[i]);
    }
    delay(1000);
    digitalWrite(4, HIGH);
    digitalWrite(5, LOW);
    delay(250);   //pause for 2.5 ms
    digitalWrite(4, LOW);
    digitalWrite(5, HIGH);
    delay(250);
  }
}

void flash(int delayPeriod){
  digitalWrite(ledPin, HIGH);
  delay(delayPeriod);
  digitalWrite(ledPin, LOW);
  delay(delayPeriod);
}
Video Showcase
Bonus: Resistor color code cheetsheet

Reference:
Fitzgerald, S., & Shiloh, M. Arduino Projects Book. Arduino AG, 2017
